Friday, February 15, 2013

Pad See Ew (Soy Sauce Noodles) and Homemade Sriracha

Pad See Ew is one of those ubiquitous Thai dishes you always see hidden on a Thai restaurant menu.  You've got your red and green curries, your Pad Thai, maybe some Pad Prik King or Gai Himmaparn, and this.  It's easy to translate - "pad" means stir-fried, and "see ew" means soy sauce.  Not much left to the imagination.  And the ingredient list essentially doesn't disappoint - noodles, meat, a few other things, and soy sauce.  Ah, but not just any soy sauce, as we will get to shortly.  It's been influenced by the Chinese, which explains why they're using the phrase "see ew", a Southern Chinese term for soy sauce, and also why Chinese broccoli is used here but in basically no other Thai staple dish I've yet come across.  I tried making this a number of times a few years ago with mixed success, then I went off into a cave and thought about what I did wrong, then looked up a ton of different recipes, and finally I took a nap.  When I woke up I assembled this new one.


Restaurant-quality.  Not something I throw out lightly.  And it's not often that people tell me to quit my day job and open a restaurant after dinner.  But that happened when I made these soy sauce noodles, after my adjustments to the recipe, my ingredients, and my process in order to best capture the flavors and textures of this dish.  Every bit of this is a spot-on copy of the best soy sauce noodles I have ever eaten which, if you haven't done so, I highly recommend you try.  I will make it a point to comment on where I have made tweaks, and what is a critical detail in making this dish.  Don't cut corners, look for the right ingredients, and you'll pull through.


Pad See Ew (Soy Sauce Noodles)
Adapted heavily from RealThaiRecipes.com
  • 2 tablespoons vegetable oil
  • 1 tablespoon chopped garlic
  • 1 tablespoon thinly sliced shallot
  • 1/2 cup pork (or chicken), thinly sliced and cut into bite-sized pieces
  • 1 cup wide rice noodles, FRESH (dried is just not going to cut it if you want the real deal)
  • 1 generous cup chinese broccoli
  • 1 large egg
  • 1 tbsp black soy sauce
  • 2 tbsp white soy sauce
  • 1 tbsp white sugar
  • 1/2 teaspoon white pepper powder
First, gather your ingredients.  This may take some time - you need to find shallots, Chinese broccoli, and things called 'white' and 'black' soy sauce.  I know what you're thinking: you've got some 'black' soy sauce already, so what the heck is white soy sauce?  Well, you are wrong.  If you have soy sauce, you have 'white' soy sauce.  Or 'light' soy sauce, which has nothing to do with 'low sodium' soy sauce.  'Black' aka 'dark' aka 'sweet' soy sauce is made by adding sugar or molasses to the soy beans before fermentation, and lends a strong sweetness and a thick consistency to the finished product.  It is aged longer than the light soy sauce, and is less salty.  It is the primary ingredient in Pad See Ew, so if you can't find it locally, order it before you make this dish.  I recommend Healthy Boy brand if you can find it.  Let's take a look at these products:

Various soy sauces.  From left to right: a) low/less sodium, sometimes called "lite", not to be confused with b) "light" or "white" soy sauce (basically just regular soy sauce), c) Thai "black" soy sauce (siew dam in Thai) aka "sweet" soy sauce, which is essentially the same as d) Chinese "dark" soy sauce

Since you're using fresh noodles, which you can purchase at the Asian grocery store, separate them from each other, and place them on a plate.  Now, if yours were like mine, you got them refrigerated, and they're a big stuck together wad that doesn't look like people food - it looks like a bunch of squid.  I tried warming in the microwave and ended up getting as far as separating the rolls from each other, then giving up and cutting them into what would later become small rice pillows.  But next time I will soak them in cold water (cold to prevent further cooking), then coax them apart gently and dry them separately from each other.

They may look like squids, but they are in fact rice noodles, all bunched together.  Soak in cold water to unravel them.

If you absolutely can't find these and end up using dried, boil them for 6 minutes, drain in cold water, and rinse 2-3 times until fully chilled.  RIGHT BEFORE cooking, remove them to colander to drain for about 1 minute.  Don’t let them sit out to dry.

Cut the Chinese Broccoli stems at an angle so they cook easier, into about 2″ (5cm) long pieces towards the top, and smaller at the stems.  Cut on a bias for nice looking pieces. Make sure to clean well.

Heat a large nonstick saute pan on the highest heat you've got.  When sufficiently hot, add the oil and swirl to coat.  Add the garlic and shallots, and fry until lightly browned and fragrant, about 15-20 seconds.

Add the pork (or chicken) and fry until cooked through. Keep stirring so the garlic doesn’t burn.

Now add the noodles.  Don't worry about the other ingredients, we'll get there.  Keep stirring so they don’t stick.  Add the soy sauces, sugar and white pepper. Mix well.  Your goal here is to infuse the soy sauce flavor into the noodle but not into the veggies or egg.  So stir this around, let it absorb into the noodles, and continue.


Let the soy sauce get into those noodles
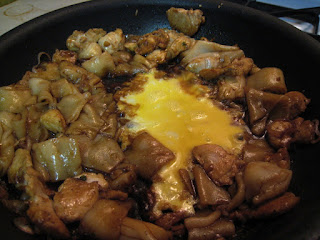
Crack the egg into the pan on top of the oil. Scramble in the pan and let sit until solid.  Break up with a spatula.


Add the Chinese Broccoli, and mix well. You may need to add a little bit of water so everything cooks and doesn’t stick.  Don’t add so much that the noodles get clumpy though - maybe around 1 teaspoon at a time.  As soon as broccoli is cooked, turn off heat and plate immediately.


Dish out and serve with soy sauce, sugar, vinegar, chili powder and white pepper so you can flavor to your taste preference at the table.


Note: If cooking more than one serving, cook them one at a time. If you cook too many noodles in the pan, you'll get a big sticky glob.


Homemade Chili-Garlic Sauce (Sriracha)

If you have a blender and 2 minutes, you can make this.  Put 8 red jalapenos, 2 cloves of garlic, and 1 tsp salt into the blender.  You may want to do obvious things like take the stems off your peppers and maybe peel the skin from the garlic, but only if you want this to be, you know, edible.  Once blended, pour this mix into a jar and top with 1/2 cup rice wine vinegar - enough to cover the pepper mix.  Let sit for a few minutes, and you're good to go!  Should keep basically indefinitely.


Tuesday, February 5, 2013

Grilled Lemongrass and Turmeric Chicken Wings


If you're following along, you know I'm searching for new and more amazing chicken wing recipes.  This means thinking outside of the box - more than just your average Buffalo wing flavors.  This one is no exception, and worth checking out.  It's more of a Thai curry, plus it has a great color from the fresh turmeric.  And once again, it meant that I got to purchase a new ingredient, not having bought turmeric in any form other than dried.


Fresh turmeric can be found in Asian grocery stores, and looks similar to ginger but with no branches and more ribbing.  It's a rhizome related to ginger, often used in Indian curries, but also used as a food coloring (specifically in mustards).  Inside, the root is a bright orange, and smells like a combination of carrots and ginger.  Careful - it stains skin and clothing quickly and effectively, making my nails look like those of an old woman.  But good news, turmeric isn't light fast, so that stain will fade over time.

Fresh turmeric looks a bit like a slug
Peeled turmeric stains pretty much everything.  That's why I'm taking the picture, and someone else is peeling it.

Grilled Turmeric and Lemongrass Chicken Wings
from Bon Appetit, July 2012


  • 1 cup canned unsweetened coconut milk
  • 3 shallots, chopped
  • 3 garlic cloves
  • 2 lemongrass stalks (bottom third only, tough outer layers removed), finely chopped
  • 2 jalapeños, stemmed
  • 1 1" piece ginger, peeled, chopped
  • 2 tablespoons fresh lime juice
  • 2 tablespoons tamarind juice concentrate (not paste or pulp) or 1 tbsp fresh lime juice
  • 1 tablespoon fish sauce
  • 2 teaspoons kosher salt
  • 1 teaspoon fresh turmeric (not powdered)
  • 3 pounds whole chicken wings
  • Vegetable oil (for grill)
  • Lime wedges

The ingredient list is strange, and is some mix of Thai and Indian flavors.  If anything, I'd say it's closest to Cambodian cuisine
Combine coconut milk, shallots, garlic, lemongrass, jalapeños, ginger, lime juice, tamarind juice, fish sauce, kosher salt, and turmeric in a blender.  Purée mixture until a smooth marinade forms.

Lemongrass has a strong citrus scent and looks really cool.  It's also really pulpy and needs to be blended well.

Add everything to the blender and puree thoroughly

Place chicken wings in a large baking dish.  Pour marinade over; turn wings to coat evenly.  Cover chicken and chill overnight.

Add the chicken, and marinate overnight.  The turmeric should dissolve more into the marinade and turn more yellow overnight.  I looked into this - apparently the color change is related to the acidity of the solution it is in.  If I had added a bunch of lye instead of lime juice, it might have turned red!


Remove chicken from marinade, shaking any excess marinade back into dish.  Transfer chicken to a large platter.  Let stand at room temperature for 15 minutes.  Transfer marinade to a large saucepan and bring to a boil over medium heat.  Reduce heat to medium-low and simmer, stirring occasionally, until marinade thickens, 10-15 minutes.  Pour half of marinade into a small bowl; set aside for basting chicken while it grills.  Keep remaining marinade in saucepan; cover and keep warm until ready to serve the chicken.

Build a medium fire in a charcoal grill, or heat a gas grill to medium-high.  Oil grill grates to prevent sticking.  Grill chicken wings, turning every 5 minutes and basting occasionally with marinade in small bowl, until fat is rendered and skin is nicely charred in spots, 30-35 minutes. (The key here is to turn the wings often so the skin doesn't burn.)  Continue cooking chicken without basting (so it will get crisp) until wings are cooked through, about 10 minutes longer.

Turn regularly and baste with the reduced marinade


Transfer chicken to a large platter and let it rest for 5 minutes. Squeeze lime wedges over wings. Transfer marinade in saucepan to a small bowl. Serve warm marinade alongside chicken as a dipping sauce.

Garnish with more sauce and a lime wedge

LinkWithin

Related Posts Plugin for WordPress, Blogger...