Sunday, July 10, 2011

Pho For Four in 45

Growing up in the midwest, I had never heard of Pho.  So when I moved to New York, this was a strange concept to me - noodle soup that was neither bland chicken noodle or an oversized bowl of wonton soup?  Blasphemy!  But you know what, Pho is a delicious part of Vietnamese culinary heritage, and I became addicted to as soon as I knew what it was.  A hearty, filling, spicy, rich, yet light soup that offers a huge amount of complexity, but is basically served on tap in Vietnamese restaurants, is cheap, and just makes you happy about life.  Whenever I am sick, the first thing I do is get a huge bowl of Pho, and that starts me on my road to recovery.  And when I'm not sick, it's even better.

Don't be fooled about a few Pho-related things.  First, it's not pronounced like "faux", it's pronounced like "fuh".  As in, the pun "pho on the floor" is technically improper, while the pun "what the pho" is valid.  I realize my title is therefore off, but it's the best I got.  Second, don't think you can wander into a Pho shop and just order anything on the menu.  It turns out the Vietnamese people eat a lot of strange cuts of beef (technically, I believe they usually use water buffalo), including 'tendon' and tripe (stomach).  But not me!  We're using top round, so don't give up on me, reader.

This recipe requires very little special equipment, though it can be helped by a meat slicer if you happen to have one (which you don't).  The premise of the dish is to get the broth rocket hot and then cook the thinly sliced beef at the last instant, so it needs to be as thin as possible.  My version uses meat sliced on a deli slicer, but you could partially freeze and slice by hand, or buy it thinly shaved at most Asian grocers.

The defining component to the Pho broth is anise seeds - don't omit these!  They taste like licorice and look like starfish, and without them the broth won't taste at all like it should.  For the record, I hate licorice, yet love this broth.

Star anise - the key ingredient in Pho broth
Most recipes for Pho call for making stock from beef bones for 4-6 hours, which I didn't want to do.  To make this soup at home, I was prepared to cheat slightly, but not to the point where I was buying Pho soup powder.  My version can be made in 45 minutes, which I feel is a significant improvement, and still tastes fairly authentic.  If you really want to, go ahead and take a day off to make this soup - it will be much better, and you'll feel like something was accomplished.  But if you don't feel like wasting a day, just try this recipe, which I have fused from 2 online recipes and my own observations.  The results are about 95% as good, plus you will have 5 extra hours of your life back.


Fast Pho
Adapted from Pleasures of the Vietnamese Table and Recipelink

Makes 4 servings.
  • 1 cup thick-sliced onions, about 1 large
  • 2 inches peeled fresh ginger, sliced into 1/3" thick rounds (skin on)
  • 10 star anise pods
  • 6 whole cloves
  • 3 tablespoons sugar
  • 5 cups non-fat, reduced-sodium beef broth
  • 5 cups water
  • 4-6 Tbsp. Asian fish sauce, or to taste
  • 3 oz. dried rice stick noodles
  • 6 oz. fresh bean sprouts
  • 3/4 lb. lean beef (I used top round), sliced about 1/16" - 1/8" thick
  • 1/4 cup each finely-minced packed fresh cilantro, basil (preferably holy basil), and/or mint leaves
  • 1/4 cup finely minced green tops of scallions
  • Sriracha (Thai / Vietnamese hot sauce, aka 'Rooster' sauce based on the label on the bottle)
  • 4 lime wedges
  • Hoisin sauce
  • 1 jalapeno, sliced into thin rounds (optional)

Over a gas burner (your grill or stovetop), char the onions and ginger over an open flame, turning to get a good char on both sides.  Remove from heat, cool enough to handle, and peel skin from edges of ginger.  In a small dry pan, lightly toast the anise seeds and cloves.

Charring the onions on the stove

Place broth and water to a large pot and add the ginger and onion slices, as well as the anise, cloves, and sugar.  Simmer uncovered for 30 minutes while you prepare the remainder of the ingredients.

Simmering the aromatics in the broth.  I have since doubled the broth recipe, so pretend the level is higher

Boil enough water to cover the dried rice stick noodles, and place in a large bowl or shallow dish to cover.  Allow the noodles to reconstitute for 15-20 minutes, or as indicated on the package of noodles.  This can vary significantly depending on what size noodles you use, so be careful not to oversoak or the noodles turn to mush.

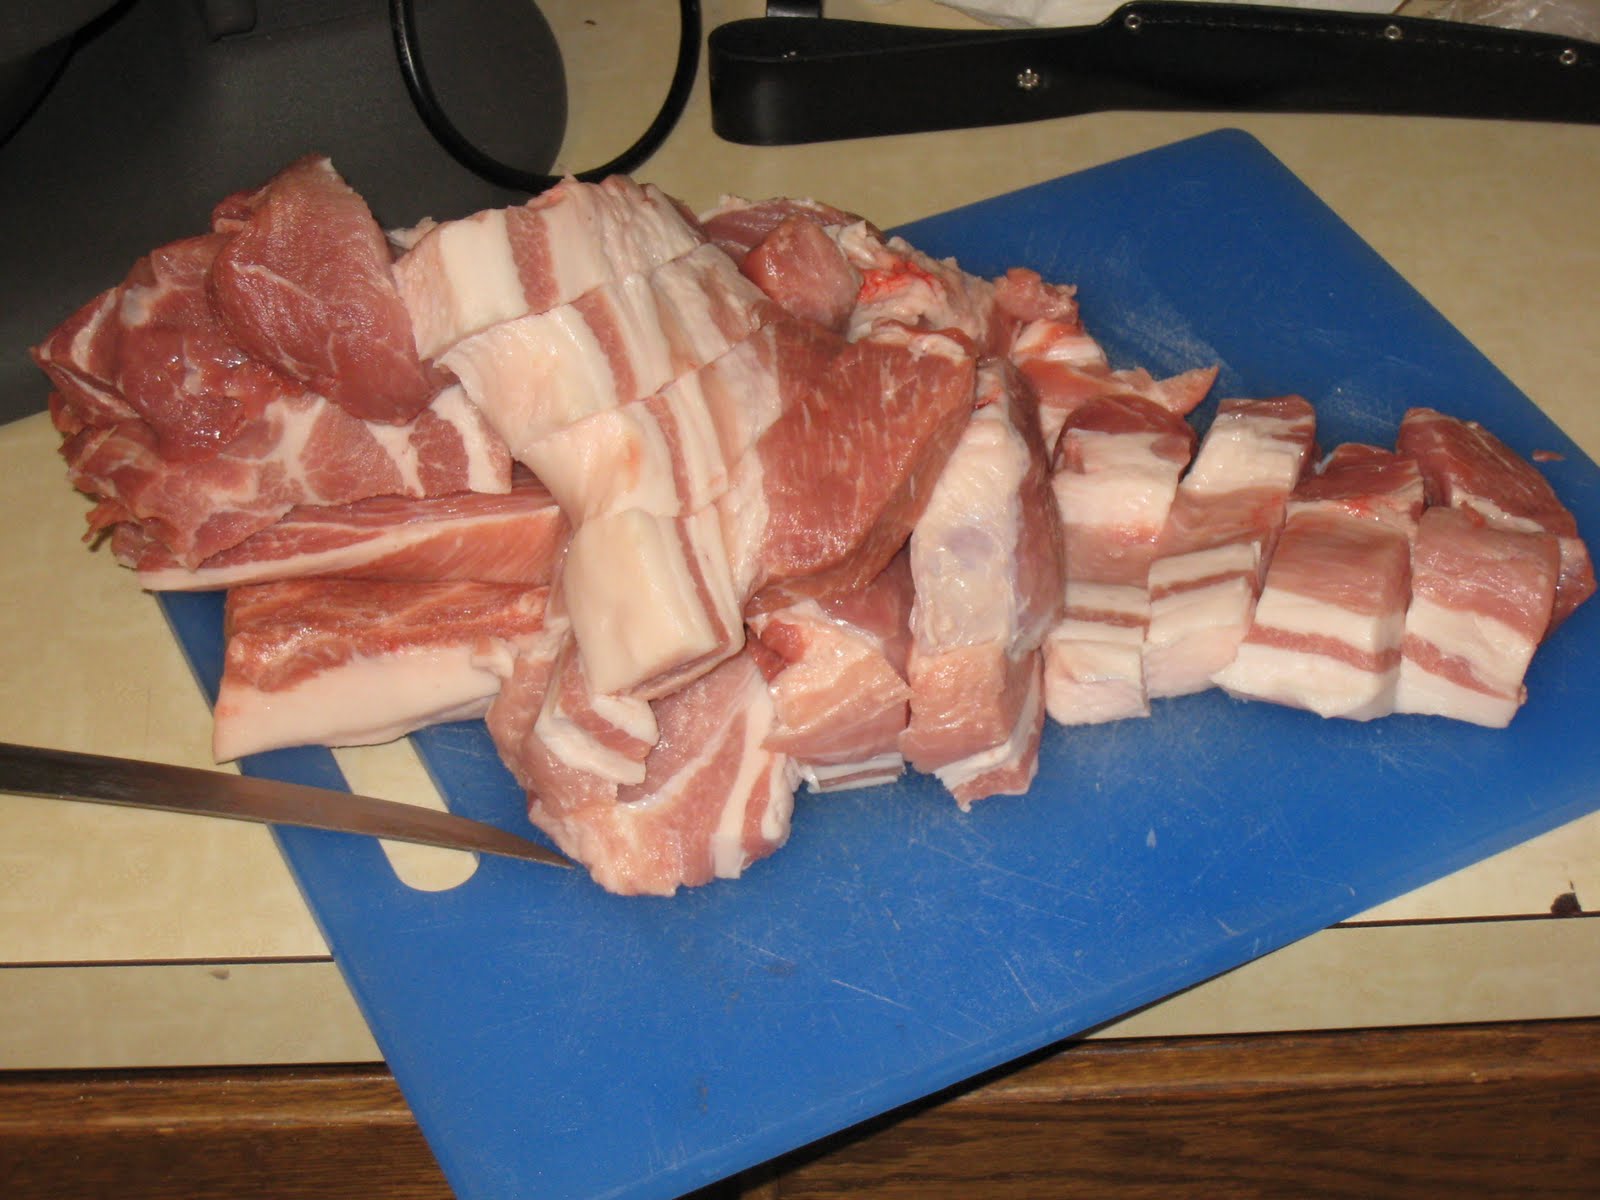
While noodles are cooking, prepare the beef - slice thinly, either with a slicer or with a knife.  If you need to slice by hand, freezing the beef for up to an hour will make the job significantly easier.  You want to get this as thin as possible without chopping off fingers by accident.

Slicing the beef paper thin.  Note that all of my fingers are still firmly attached

As noodles are finishing soaking, stir the fish sauce into the broth, and allow it to simmer for a few minutes.  Strain the broth through a strainer (potentially lined with cheesecloth if you're really inclined, which I wasn't) to remove the onions, ginger, and whole spices.  Return stock to pot and bring back to a boil.  Drain rice noodles, and portion into four serving bowls.

Strain the broth and return to a boil

Now here's where I diverge from most recipes.  To be safe, I like to throw the beef into the large pot of boiling broth rather than cooking in the serving bowls, which would otherwise seem like a recipe for disaster at home.  But seriously, don't leave the beef in for more than about 30 seconds.  Just toss it in, stir it around, and when there's no more raw color (pink is fine), you are DONE.  Serve immediately.

I added the beef for about 30 seconds and stirred it until I was sure it wouldn't be raw (NOT until it was fully cooked)

To serve, put 1/4 of the sprouts in each bowl over the noodles.  Ladle broth and beef mixture into individual bowls.  Garnish bowls with herbs (I used Thai basil and cilantro), green onions, jalapeno slices, Sriracha, lime wedges, and hoisin sauce.  If you want to let people have fun, put all of these condiments out at the table, and let everyone garnish as they see fit.  Now enjoy!  You've just made an easy Pho soup in 45 minutes - aren't you the lucky one.

The finished Pho, garnished the way we like it.  The meat is barely cooked, the broth is light and flavorful, and it didn't take 6 hours to prepare

Saturday, July 9, 2011

Szechwan Eggplant and Chicken Stir-Fry

Following on the heels of my red curry experience, I had leftover ingredients in my fridge to use up.  Chicken breasts and cubed eggplant - enough of each for a decent meal.  Other than potentially some Italian or Mediterranean dishes, the main culture that comes to mind is Chinese.  I found a recipe for Szechwan stir-fried eggplant, which I then modified to include the chicken as well.  The dish turned out fairly well, though the below recipe doubles the sauce components now that I know better, and I would marinate the chicken in something (sake and soy sauce, for example) beforehand.  If you want to make this a vegetarian dish, remove the chicken breast and go back to 5 Asian eggplants, which is what it originally called for.  Neat useless fact of the day: 20 pounds of eggplants contains as much nicotine as one cigarette!

Asian eggplant, not the same as regular.  Kinda looks like a cigarette... 


Random worthless facts of the day - eggplant contains your FDA recommended daily minimum intake of nicotine!  Source: The New England Journal of Medicine, Vol. 329:437 August 5, 1993 #6

A word about preparing stir-fry: get everything ready before you start cooking.  These dishes cook quickly, and if you don't have everything prepped and within easy reach, that's when things get ruined.  Consider getting some small prep bowls so you can just grab them and toss them in; you may see small stainless bowls in some of my other posts, and naturally I'm setting a bad example here by not using them.  But they help a lot, and keep things organized and ready to add without any delays.

The aromatics, prepped and ready to go before the wok is heated up

The rest of the ingredients


Szechwan Eggplant and Chicken Stir-Fry
Adapted from Tyler Florence recipe
  • 2 Asian eggplants, about 1 pound
  • 1 chicken breast, sliced thinly
  • 3 tablespoons peanut oil 
  • 1 tablespoon dark sesame oil 
  • Kosher salt and freshly ground black pepper 
  • 2 green onions, white and green parts, sliced on a diagonal 
  • 1-inch piece fresh ginger, peeled and minced 
  • 3 garlic cloves, minced 
  • 1 fresh red chile, sliced 
  • 1 cup chicken broth 
  • 6 tablespoons soy sauce 
  • 2 tablespoons rice vinegar 
  • 2 tablespoons light brown sugar 
  • 2 tablespoons cornstarch 
  • 1 tablespoon toasted sesame seeds, for garnish 
  • Thai holy basil and fresh cilantro leaves, for garnish
 
Cut the eggplants in 1/2 lengthwise and then slice crosswise into wedges, no more than 1-inch wide.  If using regular eggplant, just cut into 1" cubes.  In a small bowl, mix the soy sauce, vinegar, sugar, and cornstarch until the sugar and cornstarch are dissolved.


Heat a wok or large skillet over medium-high flame and add half the oils; tilt the pan to coat all sides. When you see a slight smoke, add the eggplant, stir-fry until seared and sticky, about 3 minutes. Season with salt and pepper. Remove the eggplant to a side platter, add remaining oil, and cook the chicken in the same manner.


Stir-fry the eggplant until 'sticky'.  You'll know what it means, just keep moving it around so it doesn't burn

Next, stir-fry the chicken

After all the eggplant and chicken is out of the pan, add the green onions, ginger, garlic, and chile; stir-fry for a minute until fragrant. Add the broth. Pour the soy sauce mixture into the wok and cook another minute, until the sauce has thickened. Put the eggplant and chicken back in the pan, tossing quickly, until the sauce is absorbed. Garnish with sesame seeds, Thai basil, and cilantro and serve.

Quickly stir-fry the aromatics, then add the sauce ingredients

The final product, before serving over rice.  Kill the heat before you add the basil and cilantro, or it wilts

Monday, July 4, 2011

Thai Red Curry Chicken (Gaeng Gai)

I've noticed a trend so far on my recipes - either a bunch of meat, or Thai food.  Well, today it's a meaty Thai food recipe.  Don't worry, one day soon we will break out of this trend.  Last night's dinner was my Thai Red Curry Chicken, known in parts that know these things as "Gaeng Gai", where "Gai" means chicken, and "Gaeng" means either 'curry' or 'freaking awesome', depending on which dictionary you use.  It's a very easy recipe if you have about 3 weird ingredients, all of which can be found routinely at asian grocery stores.  If you don't have an asian grocery store nearby, I recommend importfood.com, which seems to have the right assortment of foods, though I can't vouch for their freshness.

With that questionably useful tip, let me jump right into the recipe.  And at last, this one can't be attributed to another author, because I have made it dozens of times, and I've been tweaking both the ingredients and the instructions to get something I'm most pleased with.  It's still not perfect, but it's pretty close for home-cooked Thai food.

First, a word on ingredients.  In this recipe, I use Thai eggplants whenever possible, which are green globes about the size of a golf ball.  Next up, the red curry paste.  There are some standard curry pastes available both in asian grocers and now in most regular grocery stores.  I use Maesri brand red curry paste for this, although I have recently gotten my hands on some excellent imported curry paste I acquired at an asian grocery store, found in their freezer section.  Feel free to ask around, but Maesri does a pretty good job.  Next, the Thai basil.  This looks a little like basil, but with smaller, less rippled leaves.  There is also a plant called holy basil, which has more purple-colored leaves.  I like them both for this dish - they both add a licorice flavor to the basil backbone, with a hint of mint on the Thai basil side.  I happen to grow Thai basil specifically for this recipe, but it's fairly easy to come across one or both of these in the asian grocery store.  Finally, the kaffir lime leaves.  If you can find them fresh, good job!  However, you are much more likely to find these in the freezer section, in small bags.  Try looking in the smaller grocery stores - this is a somewhat hard to find item, and while not essential to the dish, it does add a tart citrus flavor to the sauce.


Thai eggplants.  Try to find them at an asian grocer, but substitute regular eggplant if you really have to

Red curry paste.  This brand is good, and easy to find.  Look for the little old lady on the side - that's always a good sign

Kaffir lime leaves.  From importfood.com - they have all of the Thai ingredients listed, if you can't find any at the store
 
 
Think about this recipe as a stew - that's all it is.  Saute your meat, throw in the liquid and vegetables, and simmer for a while.  It's very easy, and tastes just like what you'd get at a restaurant.  Very impressive results.
 

Thai Red Curry Chicken (Gaeng Gai)

Serves 2-3
Prep time: 10 minutes
Cook time: 10-15 minutes

  • 1-2 tbsp cooking oil (I use canola)
  • 2 tbsp red curry paste, more if you prefer more spicy
  • 2 cups coconut milk (go for the full fat version, it does make a difference)
  • 4 Kaffir lime leaves, shredded (optional, but I like the taste)
  • 1½ tbsp brown sugar (use palm sugar if you would like something more authentic)
  • 1½ tbsp Thai fish sauce
  • 1 pound sliced chicken breast (or lean pork, or shrimp, or tofu...)
  • 4-5 pea eggplants, quartered (substitute regular eggplant in 1" cubes if you can't find)
  • 1 bell (less preferred) or poblano (more preferred) pepper, sliced into thin strips
  • 1 small red chili, sliced (optional)
  • 1 can Bamboo shoots
  • 2 tbsp fresh Thai, holy, or standard basil leaves


Heat the oil in a wok. Add the curry paste and stir-fry for about one minute, but before it starts sticking to the wok.   WARNING: THIS MAY FILL YOUR KITCHEN WITH PUNGENT CHILE FUMES, SO TURN ON YOUR HOOD FAN AND OPEN WINDOWS!!!  If you start coughing, all is lost - you just get more worked up, and then cough even more.  You might consider drinking water... or giving up and ordering in.  No?  Good, you are a truly dedicated cook.  Throw in the chicken and quickly stir-fry to cook the surfaces of the meat and turn them white, but not necessarily all the way through.  This will infuse the chicken with the curry flavor while still allowing for them to finish cooking in the sauce, and prevent excess boiling of the coconut milk (most recipes have you just simmer the raw meat in the milk / sauce), which breaks it down too much and loses some of its fresh taste.
 

The setup.  Not a ton of things to prep this time
  
Stir-frying the chicken in the red curry paste.  Don't overcook, or else it will wring out the moisture and end up tough and dry


Now add the coconut milk, kaffir lime leaves, fish sauce and sugar.  Bring the coconut milk just to a boil, then reduce heat to a simmer. Add eggplants and whatever peppers you're using.  Simmer for about 10-15 minutes, until eggplants are tender.  Add bamboo shoots towards end of the cooking time - they just need to be warmed up, and won't add anything to the overall flavor.  Kill the heat, then add the basil leaves, tossing to coat.  Serve with steamed rice.


The full mix after it's been simmering for a few minutes.  Keep things moving so you get all of the eggplant cooked.  A lid would have helped.


The final product, served over rice.  Tastes like restaurant food, but made by you on the cheap

Ramble alert!!  I will add a caveat - I'm still not sold on when to put in the eggplant to make sure it cooks through without damaging the coconut milk.  The step for stir-frying the meat with the curry paste came from a coworker's Thai girlfriend, who told me not to overcook (or even boil) the coconut milk.  To avoid this, I once tried blanching the cut up eggplant by boiling it for 2 minutes and then dunking it in ice water, to cook it mostly through and avoid having to boil the whole stew for too long, damaging the coconut milk flavors.  However, this didn't work so well - the eggplant had very little taste when boiled in water.  Another recipe I saw called for boiling the eggplant in coconut milk, then adding it to the stew for the last few minutes.  This also seems like a decent plan, except it's the same damaging effect on the coconut milk.  So in the end, I would just recommend the original recipe posted above, and be careful not to bring the liquid to a rolling boil.  Just keep it at a simmer, or else you will both damage the sauce and make the meat tough.

Sunday, July 3, 2011

Sausage-fest

A few years ago, I took a meats class at school.  They have a working slaughterhouse on the premises, and I wanted to know if I had the nerve to process my own animals (turns out I did).  In addition to the butchering process, we learned all kinds of great techniques and recipes, including recipes for jerky, bacon, prosciutto, bologna, and sausages.  I liked making this stuff so much that I tried a few times at home, and then got wise and actually bought some equipment.

That's right, ladies and gentlemen - I own a sausage stuffer.  What, don't you?  Come on, everyone needs one of these!  What's more fun than cramming raw meat into hog intestines?  Nothing, that's what.

A Grizzly brand 5 pound vertical sausage stuffer - best bang for the buck

Allow me to paint a picture for you to convince you that you want to do this.  You're out at a German restaurant, and you get the bavarian sausage assortment.  You think to yourself, these are delicious!  I have to pick some of these up and cook them at home!  But then you go to your Safeway, or your Kroger, or your whatever, and there is no knockwurst to be found.  No bockwurst, no linguisa, no boudin blanc, no andouille.  Maybe there's some chorizo or bratwurst, but these are made by Emeril or Johnsonville, and you know they're shells of their original glory.  But then someone at the store tells you, "hey, you can make any kind of sausage you want.  Just get into the back of my van and I will show you."  And hopefully, you do NOT take him up on this offer, and instead stumble onto my blog and read on about how to do this.

Making sausage is actually surprisingly easy, and I think it's pretty fun.  If you buy ground meat, all you really have to do is toss in seasonings and get it into the casings, which can take as little as 20 minutes if you're good.  Of course, this can also be a very frustrating activity if you never had any instruction in this, so maybe you should read this guide before you run out and try to throw a bratwurst party for 30 hungry Germans.

I have tinkered with equipment in a few different combinations, and here is what I have decided you will need, at the absolute minimum, in order to make sausage:

  1. Sausage stuffer.  This assumes, of course, that you want to stuff the sausage into casings, and not just make patties with the sausage.  5 pounds holding capacity is a good starting point.  These things cost from $30 up to a few hundred, depending on what you get.  I recommend the one from Grizzly tools - it's the same exact one as on Amazon and other places, but isn't marked up as much.  Whatever you do, do NOT use the sausage stuffer tubes that attach to the food grinder of the KitchenAid.  These don't work at all.
  2. A large baking sheet, for collecting the sausages
  3. Toothpicks (all will be made clear later)
  4. A good, sharp knife, preferably a boning knife (for tearing down large hunks of bone-in pork)
  5. A food grinder of some kind, preferably something like the KitchenAid food grinder


There are plenty of good recipe sources online, but what is often frustrating when searching for sausage recipes is that most of them are for recipes USING sausage, not recipes for MAKING sausage.  If you're really serious, I recommend Home Sausage Making, by Susan Peery.  If you're only kind of serious, just read on.

My friends heard that I had this sausage stuffer, and basically demanded that I teach them how to do this.  Perhaps it's a guy thing, I'm not sure.  But there is definitely something satisfying about grinding, linking, and grilling meat without having a butcher do anything for you.  With that, how about we jump into the recipe, and I walk you through the process.


Homemade Italian Sausages
Adapted from Home Sausage Making, by Susan Peery

I have modified this recipe to omit some of the added fat, because I don't think your average Italian sausage really requires the extra, plus if you trim it up right, a pork shoulder has roughly the right proportions.  But if you really want to go the distance, use the original recipe, which calls for 4.5 pounds of lean pork butt, plus 0.5 pounds of pork fat.

  • 5 feet medium hog casings
  • 5 pounds pork shoulder
  • 2 tbsp kosher or coarse salt
  • 1 tbsp fennel seed
  • 1 tbsp freshly ground black pepper (medium grind)
  • 2 tsp crushed red pepper flakes to taste

Let's start at the top here, since this will probably cause the most confusion.  Hog casings?  What the heck does that mean?  Well, essentially it's a euphemism for 'cleaned out hog intestines'.  Yes folks, that's what you've been eating.  My sincerest apologies if you did not know, but it's been working for hundreds of years, and I don't think now is a good time to stop.  Sure, there are artificial cellulose casings for the squeamish, but what's the point?  These things work, and they have great 'grill snap' - that bite you get when subjecting the collagen in the intestinal walls to a dry, high heat.  They're also incredibly elastic and durable, and while slimy and gross to work with, they get the job done.

Where do you get hog casings?  Now THAT is a tough question to answer.  I have found them at local butchers' shops, as well as some grocery stores.  You may want to look by the chicken livers, as well as by the refrigerated pickles.  Look for either a bag, or a 1 pint tub with the casings packed in salt.  They will keep for months preserved in there.

Now, here's how you work with these things.  First, separate out a few feet of the casings from the big ball that will be packed into the tub / bag.  If packed in salt, you will want to rinse them off thoroughly.  I take a big pot, yank out the casings I need, and fill the pot with water, cycling it twice to get all the salt out.  Once I have a strand free, I run water through the casing like a water balloon, to clean it out, check for tears, and make sure there's nothing hiding inside.

Cleaning and separating the hog casings

At this point, you've got a big pot of casings ready to go.  The next step is to prepare the pork.  If it's ground pork, you're already done.  But if you're a purist and want to know exactly what cut of meat you're working with (and I suggest you do, since it's more fresh and you can say with certainty what cut of pork you used), I suggest buying a pork shoulder (picnic or butt) and trimming it up for grinding.  Follow the instructions for the grinder, which probably says to cut it into narrow strips, like this:

Trimmed pork shoulder for grinding

Note the amount of fat I left on there - this makes for much more delicious sausage in the end (hey, I never said this would be healthy).  I won't go through the whole process of grinding, but just try to keep everything as cold as possible to make life easier.  In the end, you will have about 5 pounds of ground pork to work with.

Grinding the pork strips

The finished ground pork

From here, you will add your spices.  At this point, you  could make any of a number of sausage recipes, but my friends demanded Italian sausage, so that's what we went with.  Fennel and hot pepper flakes are the main ingredients in hot Italian sausage, so that's what's going on here.  Stir everything up with your hands, and allow to rest and for flavors to combine.

Adding the spices to the pork.  Cook it from here, and you've got Italian sausage patties

Now comes the fun part - stuffing the sausages.  First, install a medium stuffer tube onto the hopper of the sausage stuffer.  Put on a few drops of vegetable oil so the casings don't stick.  Then slide the casings onto the tube, bunching up so they all fit on there.  Tie a knot at the end when you're done, so you've got a big casing 'sock' on this tube.

Loading the casings onto the stuffer tube

A close-up

Fill up the hopper with the meat mixture.  This is why a 5 pound recipe works well - it's the exact amount this thing was designed for.  Put the hopper in the base, and start cranking down until meat starts coming through the tube and is about to start pushing the sock off the tube.  Now stop.  Contemplate your life.  Why am I doing this?  Am I ready for what is about to happen here?  Is anyone around that can witness this?  Actually, I strongly encourage you to have help for this.  Turning the crank and linking the sausages is definitely a two person job.

The stuffer hopper, with 5 pounds of sausage mix loaded and ready for action

Start turning the crank, SLOWLY.  As meat fills up the casings, they will start to fill up and expand.  For the first casing, you will probably get a large air pocket in the casing first.  This is where the toothpicks come in handy.  Just poke a small hole in the casing and let the air out.  Don't get crazy with the holes, or else the casings will rupture and you'll have a mess on your hands.  But use them to keep the links free of air pockets.

You want to use both hands in this process.  One hand should keep some pressure on the tube to dispense the casings only as fast as needed, and the other should wrangle the links coming off into the right shape, and twist them off as they come through.  Note what my friend is doing here - keeping everything under control:

Feeding the sausage into the casings

If you're going to make links, fill up about 4-6" of casing, then twist 2-3 times around.  Repeat with the next link, but twist the OPPOSITE direction.  Otherwise, the links will just unravel themselves, and you'll have a mess at the end.  If you're just doing sausage rope, you don't have to twist anything.  Either way, keep going until you're out of meat in the hopper, and then tie off the last link and head out to the grill.  If you burst a lot of links and have a bunch of meat you want to still try to get cased, open up the hopper, reload, and continue until you are satisfied.
Twisting the links

A little later on...

And, we're done!  Only one blown out casing - not too bad.

That's it!  You have now made your own sausage.  They probably don't look perfect, but mine don't look perfect either.  At least you can say that you made them yourself.  Plus, you can start experimenting with all kinds of different ingredients.  Chicken and apple sausage?  Alligator sausage?  Thanksgiving sausage?  Bacon and bourbon sausage?  Basically, you can make anything into a sausage - you just have to dream it.

Sausage on the grill.  I don't need to give directions here.


The finished product.  Italian sausages, made entirely by you


If you have any amazing successes, I'd like to know about what kind of crazy ingredients you combined.  Maybe I'll post the best recipes, and we can get some kind of underground sausage cult following started.  Or maybe not - just go make sausage!

Saturday, July 2, 2011

Pineapple Fried Rice

You know what mystery reader, I like you.  I know we only just met a few minutes ago, but I feel like you really get me.  And because I like you, I'm going to give you an awesome recipe - my pineapple fried rice.  Well, I say mine, but I did liberate it from the internet.  This one is restaurant-caliber, no joke.  Serve it to a boss, and you will be promoted.  Serve it on a date, and you may get engaged.  Serve it to your children, and they will move out and buy you a car.

Okay, back story.  I spent 10 years in upstate New York - the birthplace of Thai food.  And they had a noodle shop there called 'Asian Noodle House'.  Fairly nondescript, I know, but they had the best fried rice and noodle dishes, and exposed me to a number of ones I had never heard of.  This spawned my love for Pad Kee Mao, Pad See Ew, and pineapple fried rice, all of which I had never tried before.  Since then, I have learned to make all three, but today we focus on just the one - sorry.  If you want the others, message me and I will make and post them.

The first time I made this dish, I actually hollowed out a pineapple into a boat, used the pineapple in the dish, and served the fried rice in the pineapple.  This went over very well with my audience, and if you have the time and inclination, I highly recommend it.  This week, however, I just used pre-cut pineapple for expedience, which ended up not even saving me that much of the total prep time.  You'll see why in a second.  With that in mind, I will say this:

WARNING!  THIS IS A LABOR OF LOVE DISH!
BE PREPARED TO SPEND TOO MUCH TIME PREPARING,
NOT ENOUGH TIME EATING

I will say this: this recipe is 100% poached from online.  I acquired it here, where there are actually a number of respectable Thai recipes.  But it didn't have the fun pictures or commentary, so naturally you'll use my version, right?  The recipe contains curry powder, which I think lends an interesting touch of spice to the dish.  Clearly there's some spillover between Indian and Thai ingredients.

The finished product, although not served in a pineapple shell like I have in the past.  I will update next time I make this.

Pineapple Fried Rice
From About.com, by Darlene Schmidt
  • 1 cup pineapple tidbits (fresh is better, but canned works too - I used Del Monte Fruit Naturals)
  • 4 cups cooked rice, preferably at least 1 day old (seriously - don't use fresh rice, it will turn to paste in the pan)
  • 3 tbsp oil for stir-frying
  • 2 shallots, thinly sliced
  • 3 cloves garlic, minced
  • 1 red or green chili (de-seeded if milder rice is desired)
  • 1/2 cup roasted unsalted cashews
  • 1/2 cup frozen peas
  • 1 egg, beaten (omit if vegan)
  • 1/4 cup currants (or raisins)
  • 3 tbsp. chicken or vegetable stock
  • 3 tbsp. fish sauce (or substitute 3+ 1/2 tbsp. soy sauce if vegetarian)
  • 2 tsp. curry powder
  • 1 tsp. sugar
  • 3 spring onions, finely sliced
  • 1/3 cup fresh cilantro
  • Optional: 8-12 fresh shrimp/prawns (I used chicken this time - about 1 breast, chopped into bite-sized pieces)
Start by preparing the rice - THIS IS A VERY IMPORTANT STEP.  Add a little oil to the rice (up to 1 Tbsp.) and work through with your fingers. You want to separate the grains of rice, so that they don't stick together. Set aside.  Why do this?  Well, if you've ever made fried rice without tossing the grains with oil, you know first hand how easily the rice burns to the pan, and how it explodes everywhere as you try to break up the clumps.  This solves both problems.

Definitely toss the day-old rice with oil, to break up clumps and avoid burning in the pan

Ahh!!!  Rice fingers!  Sorry, on with the show.

Chop your vegetables, protein (if using), and ready easy to reach prep bowls with all other ingredients.  Mix together the chicken or vegetable stock, fish sauce (or soy sauce), curry powder, and sugar. Set aside.

Chopped up aromatics
A healthy quantity of protein

See why this is a labor of love?  This is the setup for about 5 minutes of cooking time

Swirl 2 tbsp. oil around a wok or large frying pan over medium-high heat. Add the shallots, garlic, and chili, stir-frying for one minute, or until fragrant. If using shrimp / chicken, add it now as well.

Stir-frying the aromatics...


...and the chicken

Push aside the shallots, garlic, and chili to make room for the egg (if using). Add the beaten egg to the wok/pan, and stir fry quickly to cook (like making scrambled eggs). 


This photo was hard to get.  The elusive 'cooking, but not yet ruined' scrambled egg photo is tough to capture for a single photographer chef


Stir sauce mixture well, then add to wok/pan.  Add the cashews and stir-fry for 30 seconds.

Now add the prepared rice to the wok/pan. Stir-fry until all the rice has mixed with the sauce and is a uniform color. Break up any lumps with your utensil or a fork.  Do NOT add any more water/broth or other liquids to the rice at this point, or it will end up mushy. You can push ingredients aside and add a little more oil to the bottom of the pan if rice is sticking. Continually lift/scoop up rice from the bottom of the pan, tossing rather than stirring it.  Think about it like an egg foam, and try to 'fold' the ingredients together rather than scooping and mushing things.


Add in the broken up rice and fold to combine

Add the frozen peas, currents (or raisins), and pineapple. Stir-fry to mix in.

Continue stir frying until everything is integrated (1-2 more minutes). Cooking tip: You should be able to hear some rice "popping" or crackling in the pan. Finally, do a taste test. If not salty enough, add 1 tsp to 1 Tbsp. more fish sauce (or salt if vegetarian). If not spicy enough, add more chopped fresh chili. If too salty for your taste, add a squeeze of lime or lemon juice.


Toss in your extras - golden raisins, pineapple, peas

To serve, sprinkle with spring onion and cilantro. Serve on a platter, or, as they do in Thailand, in a pineapple.  Thai chili sauce can be served on the side for those who like it extra spicy.

That's it!  I hope you enjoy, and that it pleases you to no end.  Of course, few of you will want to chop and prep a bunch of things for 45 minutes before you can even start cooking, but if you can stand it, it's worth the time investment.

LinkWithin

Related Posts Plugin for WordPress, Blogger...