Showing posts with label Thanksgiving. Show all posts

Sunday, February 2, 2014

Thanksgiving in January Continues: Turkey Pumpkin Chili

What do you do with leftover roast turkey and leftover roasted pumpkin?  Well, other than turkey-pumpkin surprise, you could try this recipe, which I pulled from the Whole Foods website.  I thought the flavor was great, and while it looks very similar to a generic tomato-based chili, it's definitely a lot more complex, and probably more healthy to boot.  There's a mild hint of sweetness from the pumpkin, and a nice earthy complexity from the use of turkey instead of ground beef.  I would make this again if presented with the same leftover ingredients, but I wouldn't go out of my way to roast a pumpkin for this dish, for what it's worth.


Turkey Pumpkin Chili
Whole Foods

Serves 6
  • 2 tbsp extra-virgin olive oil
  • 1 small yellow onion, chopped, chopped
  • 1 green bell pepper, cored, seeded and chopped
  • 2 jalapeños, seeded and finely chopped
  • 2 cloves garlic, finely chopped
  • 1 lb ground white or dark meat turkey
  • 1 can (14.5 oz) diced tomatoes, with their liquid
  • 1 can (15 oz) pumpkin purée
  • 1 cup water
  • 1 tbsp chile powder*
  • 1 tsp ground cumin
  • 1/2 tsp salt
  • Ground black pepper, to taste
  • 1 can (15 oz) kidney beans, rinsed and drained
*First, note that one of the ingredients is chile powder - this means chile peppers, and nothing else.  Otherwise, you're just getting a stale mixture of the other spices that are already in the ingredient list.  So this means that the best thing you can do is make your own, which is what I do.  Grab some dried chile peppers from your local latin market or the latin section of a regular megamart.  I recommend ancho and guajillo.  Tear off the stems, remove the seeds, and warm in a dry skillet over high heat.  Now tear up and place in a spice grinder to powder the chile peppers, straining through a mesh screen to catch unground pieces.  Store this in an airtight container for up a few months.  For me, 7 chile peppers got me about 5 tbsp of chile powder.

Making my own chile powder - it's not too hard, it's fresh, and you only have to do it once in a while

Heat oil in a large pot over medium high heat. Add onion, bell pepper, jalapeños and garlic and cook, stirring frequently, until tender, about 5 minutes. Add turkey and cook until browned. Add tomatoes, pumpkin, water, powdered chiles, cumin, salt and pepper and bring to a boil. Reduce heat to medium low and add beans. Cover and simmer, stirring occasionally, for 30 minutes more. Ladle chili into bowls and serve.

I used cooked leftover turkey, and skipped the browning step.  Note the fresh roasted pumpkin instead of canned - makes a big difference

If using leftovers, add the meat, saute for a few minutes, then continue with the recipe

No, it's not baby food.  It's home roasted pumpkin.

Sunday, January 26, 2014

Perfect Roast Turkey (Thanksgiving in January series)

I decided to hold Thanksgiving in January, and make a turkey with all of the trimmings.  The last time I made a bird, I had the same problem we all have - the breast came out dry, the legs started to burn, and the thighs were just barely done at the joint.  Sure, there are many workarounds for this - oven bags, brining, deep frying, basting, tenting - but they all have their downsides.  For example, I don't have a spare 5 gallon bucket that I can keep in a fridge for brining, and I want crispy skin, so oven bags are out.  And as for the other tricks, I just never can seem to get them completely right.  Time for physics to step in.

Exactly like my very first post ever, which is about perfect roast beef, the trick that I stumbled on for turkey has everything to do with heat transfer.  If you cook a bird at a high temperature, by which I mean anything 300 degrees F and up, you are exposing the outer layers of the meat to hot, dry air, while slowly forcing that heat down into the center of the bird.  So what do you think happens?  The breast gets way above the temperature you want it, and no many thermal probes you defile your bird with, you still have to make the best scientific wild-ass guess (SWAG) about whether there will be pink flesh at the joints, ruining the meal for everyone but the dog.  Now, a better approach is to cook the bird slowly, at a very low temperature.  This causes two things to happen: first, the temperature of the bird rises more evenly, ensuring that the meat at the joints is cooked without overheating the delicate breast meat.  Second, and possibly more importantly, the bird has time to let the marbled fat and connective tissues slowly break down, self-baste, and become meltingly delicious at the table.  And this is just from cooking at a straight 250!

One last component to this magic is the start to the cooking process.  It turns out that if you just cook at a low temperature, you get a somewhat soggy, boring skin.  The poor beast never has a chance to crisp up at low temperatures.  Once again, science can save the day.  If you start by blasting the bird at 450 for a while - say, 40 minutes - and then lower the temperature way back to 250, you will crisp the outermost layer of the bird, also known as "the delicious skin", without the rest of the meat having any idea what's going on at the surface.  It's exactly like making roasted peppers - char the skins on a hot grill before the flesh inside gets cooked.  Bring the temperature back down after the sear and you're completely safe.

I know that this is the way to go for a variety of reasons, not the least of which was the compliments from my guests.  First, the skin is so good you almost want to just run off with it in a corner and eat it as your whole meal, irritating your guests and letting down the whole family.  Second, you get a better, richer mouthfeel for the turkey, which I believe is from the fat and some connective tissue breaking down in the meat while it cooks over such a long period, almost like a stew would do.  Third, due to the even temperature distribution of the bird, when you pull this out and start carving, the juices don't run all over the place the second you touch it.  This is a good sign that the meat isn't basically clenched tighter than a miser's checkbook after cooking, letting you skip that whole 'rest the bird' nonsense while things even out.  All you need is patience during cooking and a couple of extra hours in the oven.  And a turkey baster.

The world's most perfectly roasted turkey, in my opinion


Perfect Roast Turkey


  • One turkey, 12-??? pounds.  I used a 20 pounder for this experiment
  • 1 tablespoon unsalted butter
  • 1 tablespoon extra virgin olive oil
  • 2 tsp kosher salt
  • 1/2 tsp crushed black pepper
For the love of all that is holy, thaw your turkey out before you start this exercise.  I had mine in the fridge for a solid week before even considering this.  Rinse and pat dry your turkey, leaving it on a v-rack for a while to start coming to room temperature, breast side up.  I hacked out the wishbone to ease carving later, but that's not necessary.  Get a long piece of butcher's twine and tie the legs together, and try to tie them to the tailbone to make a denser, less exposed set of appendages.  Meanwhile, set the oven preheating to 450 degrees F.  After a few minutes of air-drying, come back and sprinkle the salt and pepper on the skin and inside of the cavity.  The salt will pull a bit of moisture out of the skin, promoting crisping.  Leave this on for the remainder of an hour on the counter, and then brush the upper and side surfaces with a mixture of the olive oil and the butter, melted in the microwave.

Pop the turkey into the 450 F oven and leave it undisturbed for 40 minutes.  Then reduce the temperature to 250 F and cook until done.  Starting at about the 2 hour mark, every 60 minutes, open the oven briefly and suck out the drippings from inside of the cavity and from the bottom of the roasting pan, setting them aside in a fat separator to make gravy later.  DO NOT BASTE with this liquid, which is actually a terrible idea with this low and slow method.  The turkey will self-baste and can't possibly get dry during the process, and removing extra moisture will promote the dry heat that will keep the skin crisp on all sides of the bird.

That's really it.  I swear.  Start to finish, this took me over 6 hours for a 20 pounder, and it would have taken 7 if I hadn't boosted the temperature at the very end to accommodate my guests' arrival times.  The result?  Completely moist, delicious, fork-tender breast meat, perfectly cooked thighs all the way down to the joints, and the most crisp, most non-burnt skin I have ever made, possibly ever eaten, on a turkey.  Unbelievably impressed with the ease of this one.

Look at that skin.  Tight as a drum, and crisp like a potato chip.

Slice your bird just right, and you can get the breast off in one piece free of all bones, carving it tableside with ample crispy skin for everyone

Update: within a few hours, a whole bunch of people I know are asking about smaller turkeys and chickens.  I believe someone's trying 5 pound chickens tonight, and a 12 pound turkey tomorrow.  Without crunching any numbers, here's my assessment: for a 5 pound bird, try 15 minutes at the higher temperature (450 F), and then lower it to the same low temp - 250 F.  A small bird like that may only take an hour of normal cooking, so 15 minutes can do a lot to something that small.  For a 12 pound bird, I think you could get away with 30 minutes at the higher temp, maybe even more.  I could try to break out my heat transfer textbook, but I would rather rely on first-hand accounts of this.  Hopefully people will post results in the comments, so everyone can learn together (especially me).

Friday, November 25, 2011

Roasted chestnut and sausage stuffing

Call it dressing, call it stuffing, call it whatever you want - it's all the same when you eat it.  And after years of making different stuffing recipes, I've come to appreciate the value in an easy one that tastes really good.  Unless, of course, you consider roasting chestnuts to be difficult.  Which you probably should.

This is the recipe we've used for the past three years running at Thanksgiving, because it doesn't involve sitting around chopping vegetables for 20 minutes before you even start the cooking.  Plus, we used pre-roasted chestnuts this year, which saved a ton of time and frustration.  Still, there's no experience quite like cursing at a chestnut that won't open correctly; chestnuts are like honey badgers - they're crazy, and they don't care about you or your priorities.  But home-roasted chestnuts can be quite delicious, so it's something to consider when you make this dish.

Here are some of the special tools you should have to make this stuffing:
  1. Food processor.  You don't have to chop up vegetables for this recipe.  You just through your mire poix right in the processor and go to town.  So if you don't have a processor, the merits of this dish will be lost on you.
  2. Electric bread knife.  You have to tear down a loaf of sourdough bread into cubes for this, and it's a PITA.  If you don't have an electric knife, you at least need a decent serrated bread knife.
  3. Paring knife.  If you plan to roast your chestnuts, you need a good paring knife to score them without destroying them.
I found this recipe on Food Network's website after one too many failed stuffing attempts (oysters one year, wild rice another, I think curry found its way in once).  It's really good, and another one of those sides that's overly filling but which we can't live without.  Once nicely roasted, the stuffing gets crispy around the edges and highlights the earthy taste of the chestnuts, the pungent sausage, and the mildly tart kick from the bread, and makes for a really awesome combination of flavors.


Chestnut and Sausage Dressing
By Tyler Florence (unmodified)

  • 1 medium carrot, peeled and rough chopped
  • 1 medium onion, roughly chopped
  • 2 stalks celery, roughly chopped
  • 1/2 bunch fresh sage
  • 1 1/2 pounds loose sweet Italian sausage
  • Extra-virgin olive oil
  • Kosher salt and freshly ground black pepper
  • 5 cups cubed sourdough bread, crusts removed
  • 1 pound roasted chestnuts
  • 1 cup low-sodium chicken stock
  • 1/2 cup heavy cream
  • 1 large egg

The setup - note that we started with pre-roasted chestnuts this year.  No open fires for us.

Preheat the oven to 375 degrees F and butter a 9" x 11" baking dish.  Seriously, butter it up - I forgot to do this once and the bottom got burnt, and it was no fun.  You only need a little, just smear a stick around and then get in the corners with a paper towel to distribute.

In a food processor, puree the carrot, onion, celery (the mire poix) and sage until you have a fine pulp.  Okay, I lied about the no chopping thing - you have to hack the vegetables into pieces small enough to fit in the processor, but that's it!  Cube the sourdough by first removing the crusts, then slicing into about 3/4" rounds, and then cubing that into 3/4" cubes.  Any bigger and the stuffing will come out dry.  Much smaller and it will be mushy.  A little variability in your cuts will help you get any combination of the above consistencies you want.  Roast the chestnuts by scoring an "X" in the convex side of the shells and throwing into a 425 F oven for 30 minutes, until the shells have split open.  Then peel them while they're still warm.  Consult the internet (http://bit.ly/vrwdOo) for further information.

The food processor option is much easier than chopping a bunch of vegetables

This is what the cubed bread should look like.  This would have been vastly expedited with an electric knife

Set a large skillet over medium-high heat and brown the sausage in a little olive oil.  You want to brown this in bite-sized chunks, so throw it in the pan and then break it up with a spoon.  And like I said, you want to BROWN this.  Don't just "grey" your meat - let it get some color on there.  It's called the Maillard reaction, and it's a good thing.  To do this, get the meat broken up into the right sized pieces, then just let it sit for a couple of minutes.  Don't just stir the heck out of it until it's a uniform gross color - let the bottom brown by sitting on the hot pan until the amino acids in the meat start to do their thing, then stir a couple of times to get the other sides similarly browned.

Notice how there is actually some brown coloring on the meat?  You want that - it makes your food taste good.  Stop stirring, and just be patient.

Once you have a nice brown color and the fat has rendered (about 5 minutes), use a slotted spoon to remove the sausage and place in a large mixing bowl.  Add the vegetable pulp to the pan and saute until most of the moisture has evaporated.  Season with salt and pepper.  Add to a large mixing bowl along with the sausage, the bread cubes, and the chestnuts.

Mix together chicken stock, cream and egg.  Pour this wet mixture over the dressing mix. Season and fold everything together.  Now here's a tip - don't press on the stuffing when you put it in the roasting dish; in fact, don't even pour it.  Scoop it out delicately and try to pack into the dish as loosely as possible.  This will ensure that you get good browning and even cooking, and you don't end up with mushy stuffing at the end.  Bake for 30 to 35 minutes until golden brown on the top (if it gets too brown before the 30 minutes is up, tent with foil).

Light and fluffy before baking, because it wasn't pressed into the pan.  It's like a big delicious cloud of awesomeness.

The finished stuffing, nicely browned and crispy in virtually every bite.

Serve with your favorite fowl, and enjoy!  I find that this doesn't really require any gravy to improve on the flavors, but that doesn't mean it's not still good with gravy.  Besides, what isn't?

Twice-baked Butternut Squash with Kale and Goat Cheese

Wandering the stores before the Thanksgiving holiday, I watched as people bought strawberries, asparagus, and all kinds of other things that aren't in season right now, and probably taste like pale husks of their intended glory.  And I figured it would be irresponsible not to at least serve something that makes you feel like it's actually Autumn.  But all I kept seeing were soup and casserole recipes, and they weren't doing it for me this year.  So I started thinking, what about a "twice-baked squash"?  You know, you cook it, then you fill it up with something, and then you cook it again.  Maybe omit the large amounts of sour cream that rocketed the twice-baked potato to stardom, but at least fill the squash with other seasonal ingredients.  Plus cherry tomatoes - I know, I'm a terrible person.

In my hunt for this recipe, I came pretty close with one from Olive Magazine, which called for zucchini and bell peppers to be stuffed into a roasted squash.  So I modified the ingredient list slightly, to substitute in sauteed kale instead.  The result ended up exceeding my expectations and capacity, full of complex flavors from the roasted vegetables, and filling enough to be its own meal.  For better or worse, this ended up being one of our sides for Thanksgiving, so we ended up with quite a bit left over.  Overall, this recipe would make a great vegetarian dinner or an impressive (but large) side.  I don't even know what to call it because there's so much going on, so let's just go with twice-baked squash.

A bit more healthy than your average twice-baked potato, I'd say


Twice-Baked Butternut Squash with Goat Cheese and Kale
Modified from Olive Magazine, March 2007

  • 2 small butternut squash
  • 1 garlic clove, crushed
  • 3 tbsp olive oil
  • a pinch (1/8 tsp) dried red chile pepper flakes
  • 1 tsp thyme, chopped
  • 10 ounces kale, torn into bite-sized pieces
  • 2 small red onions, cut into thin wedges
  • 7 ounces cherry tomatoes
  • 3 ounces pine nuts
  • 3 ounces goat's cheese, crumbled
  • 1 tbsp breadcrumbs
  • 1 tbsp parsley, chopped
  • 1 tbsp parmesan

Heat the oven to 400 F. Cut the squash in half and scoop out the seeds, then cut criss-cross patterns over the cut side of each one.  Mix together the garlic, 2 tbsp olive oil, chile flakes, and thyme, and brush this mixture over the flesh.

The prepped squash, before roasting

Place the squash on a large sheet pan lined with parchment paper, and bake for about 20-30 minutes.  Then add the onion wedges to the sheet pan, and roast for an additional 20-25 minutes.  Finally, add the tomatoes and pine nuts, and cook for another 10 minutes.  If at any point the squash look to be done, remove them to a plate and finish roasting the remaining vegetables.  What does that look like?  Well, see below.  Also, smoke coming from your oven is a good indicator that you should roast for at least another 3 hours, and then go out for dinner.  Total time for the squash to be in the oven in this step is 45-60 minutes based on how well your oven is calibrated.


The squash and vegetables, after roasting.  Sorry you can't smell this through your computer screen, but maybe if you try hard enough...


To make the filling, saute the kale in a large pan over medium-high heat in the remaining 1 tbsp of olive oil.  Add salt and pepper to taste, and feel free to add some additional crushed garlic in this step as well.  Then, in a small bowl, mix the breadcrumbs, parsley and parmesan.  All of the above steps can be completed early in the day, or the day prior.


Kale - it's not just for decorating cheese trays and salad bars anymore.  Saute in a large pan with olive oil.

Garnish the stuffed squash with a mixture of breadcrumbs, parsley, and freshly grated Parmesan
 
Try to shove everything into the squash in an attractive way, then roast again to brown and melt the cheeses

Arrange the roasted vegetables and goat's cheese in the squash halves, scatter with the breadcrumb mix and bake for a further 10 minutes or until golden and bubbling.  If you prepared the ingredients earlier and they have cooled, add another 10 minutes to the cooking time.

Here's what the finished product looks like, served as part of our Thanksgiving meal


Wednesday, November 23, 2011

Whole Fresh Cranberry Sauce

What could mean Thanksgiving more than homemade cranberry sauce?  Okay, it could be the turkey, or the pumpkin pie, or the family drama and people screaming at each other.  But for the sake of my sanity, let's say that it's the cranberry sauce.

The world can be divided into two types of people: those who like whole berries in their sauce, and those who prefer the homogenized stuff that can be sliced into beet-like pucks.  I suppose there's a third camp of people who like neither, but those people probably aren't reading this, and therefore I will lump them in with the Amish as people who will never read this blog post.  This does not mean, of course, that the Amish don't like whole berry sauce, which I assume they do.

Making your own cranberry sauce is a family tradition at my house; specifically, it's my job every year.  I claimed this years ago when I discovered how easy it was and how excellent the results can be.  And what's more, it's essentially fool-proof, which I will explain at the end.  Top that off with the fact that it's only got seven ingredients, and I think we have a winner that should be on every table each Thanksgiving.  You can even show up at someone's house with this and tell them how difficult it was to make, earning extra mileage for your easy task.

I'll put the bottom line up-front: this sauce is awesome, and incredibly easy.

This recipe comes from a faded old magazine insert of my mom's from somewhere between the silent film era and the disco era, called "Epicure's Wild Gamesmanship".  It's faded and taped together, and you're always worried about it not surviving through the next holiday but it seems to anyway.  I'll include a picture just for kicks.


Look at how old this thing is!  I'm not even sure turkeys had been domesticated when they printed this


Homemade Cranberry Sauce
from "Epicure's Wild Gamesmanship"

  • 1 quart fresh cranberries, washed and cleaned (we just use 1 standard bag)
  • 1 cup sugar
  • 1 cup water
  • 1/4 tsp powdered cloves
  • 1/2 tsp cinnamon (we use Vietnamese for extra kick)
  • 1/8 tsp nutmeg
  • 1 tbsp fresh lemon juice (if you use the stuff from a bottle I will come find you - don't do it!)

Put all ingredients into a medium pot, bring to a boil, lower the heat, and simmer for 10-15 minutes or until the berries pop.  Don't keep it at a rolling boil, or else you'll end up with a mess to deal with on the stovetop, and this stuff can be like napalm since it's so sticky.  Instead, go for a gentle simmer, stirring to get a feel for how the berries have popped.  Be gentle if you want to have some body to the sauce when you're done; this year I didn't push on the berries to force them to pop.  Only the ones that were ready to go after 15 minutes ended up bursting fully, so we will have more berry consistency when we eat tomorrow.

This is all you need (plus water)

Kind of looks like Christmas, doesn't it?

This is what the berries look like when they start splitting open.  Cook for a few more minutes to let the pectin from the berries get out and swim around in the cooking liquid.

When the berries have popped, that means they have released their pectin into the sauce.  Pectin is one of the wonders of the culinary world, used in pie making as a thickener much like flour is used to thicken a gravy.  You'll find that if you chilled this down right now, it would be pretty close to the correct consistency.  But there's another step.

Remove the berries with a slotted spoon, so you can reduce the liquid without overcooking the berries

Remove the berries with a skimmer (gently), and continue cooking the liquid over low heat until it is the consistency of thick syrup.  You might not know when this occurs because it's hot and things are more viscous then, so here's how you can tell - take a wooden spoon, coat the back, and run a finger down the spoon.  Now hold it vertically and see if the liquid drips down where you had your finger.  If it stays put, you're done.  Pour the liquid over the berries and chill for at least 4 hours.  Serve with your favorite fowl.

Sauce not reduced enough - see the drip over the line?  Give it another minute or two.

That's better - the sauce stays put after you swipe across it and burn your finger.

Now, I mentioned that this is a pretty forgiving recipe, right?  Well, let me list all of the ways you can screw this up and have it still come out great:

1. You only have frozen cranberries.  No matter, throw them in frozen!  In fact, this is even better - you can buy a bunch of bags around Thanksgiving, then save them for the rest of the year to make this on demand.
2. You overcooked the berries before removing them.  Don't worry, just throw the whole thing in a bowl and call it a day, skipping the strain and reduce steps.
3. You squished all the berries while it was boiling, and they're not as "whole" anymore.  So what?
4. You don't have a lemon.  So use an orange.

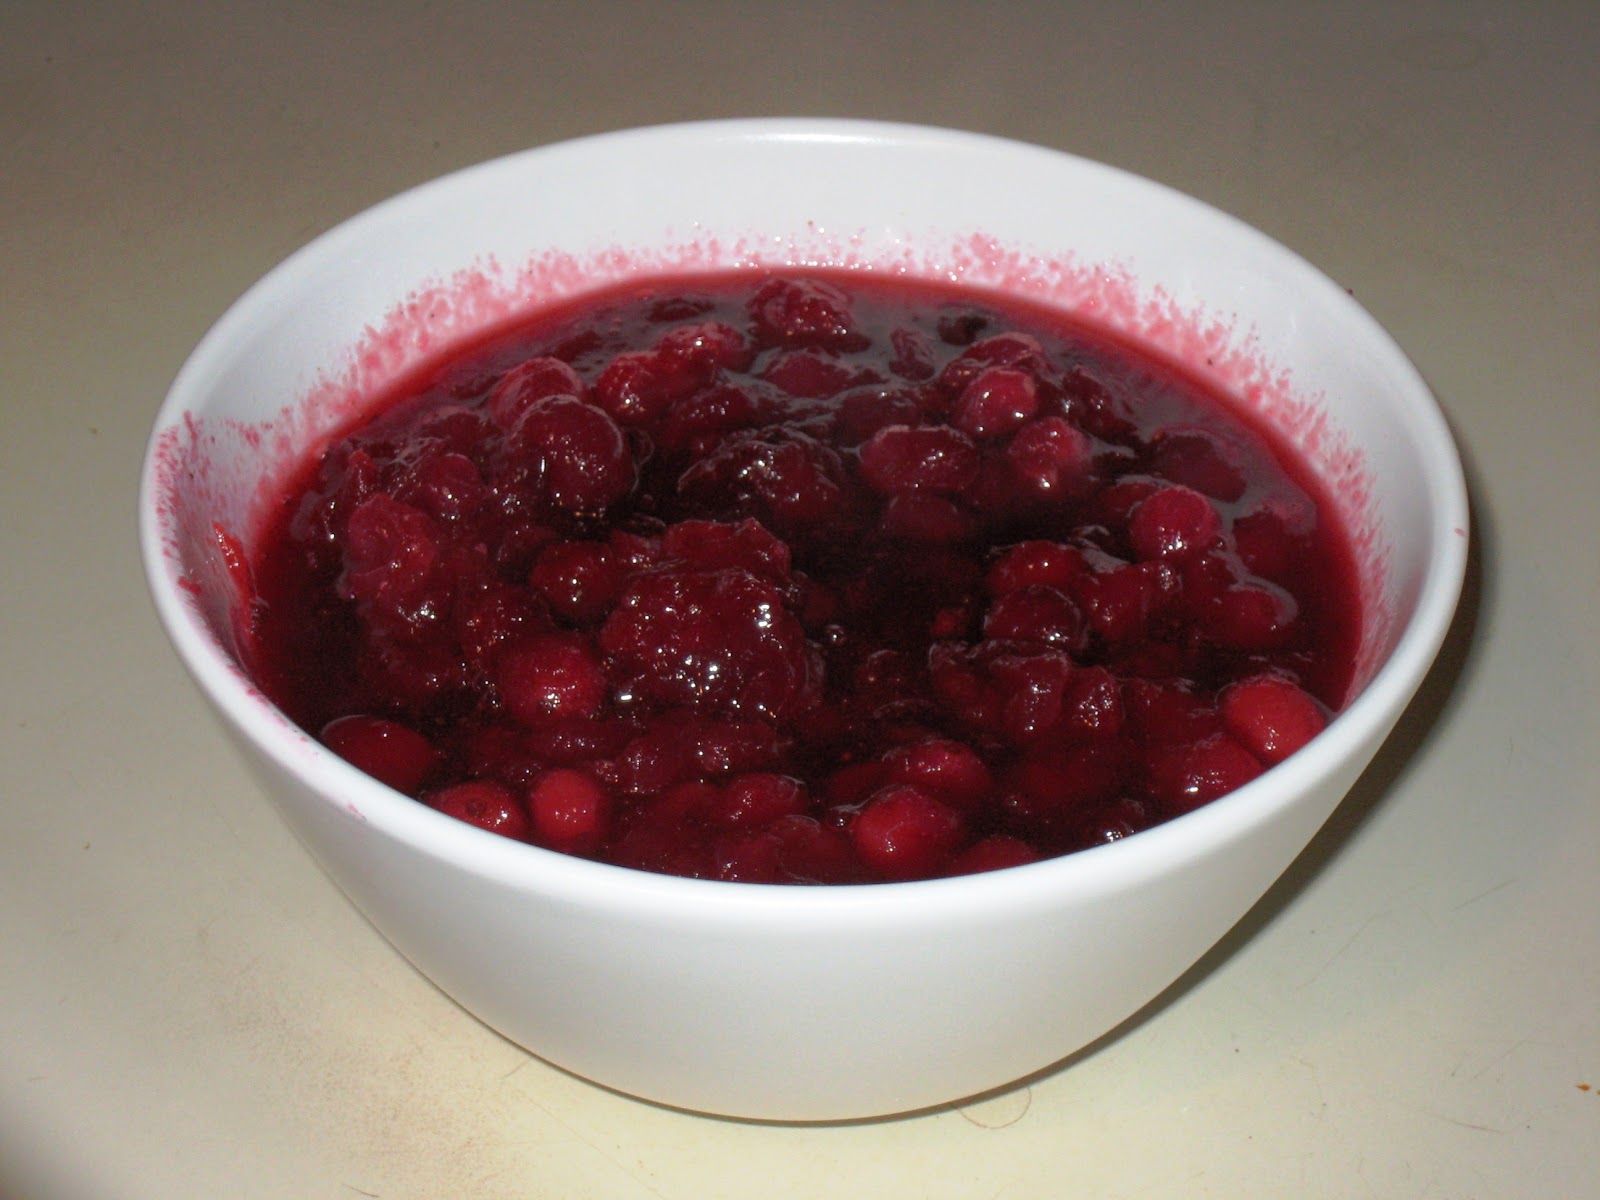
The finished product

Putting that finished product to good use.  Other recipes from this plate can be found here and here

LinkWithin

Related Posts Plugin for WordPress, Blogger...