Showing posts with label roast. Show all posts

Tuesday, February 4, 2014

Slow Cooker Pot Roast Sliders with Blue Cheese

Okay, here's a quick one with only one picture - sorry, I'm the worst blogger ever sometimes.  In my defense, I was trying to throw a party, which went over much better once I served everyone some pot roast sliders.  And that brings us to the recipe, which I found online and modified slightly to improve the flavor and healthiness, and also to use what I had available.  I'll note that the original recipe called for chuck roast and I used top round, which is MUCH more lean and probably didn't have quite the same flavor or moistness as would have been found in the original, but it was still delicious, meaning this is pretty forgiving.

If I had it to do over, I would brown the meat, and would definitely use chuck roast to get something a bit more moist and rich, but I was pleased with the immense amount of flavor these sandwiches had, most of which happened to come from the pungent blue cheese paired with the tender threads of a mild, tender beef.  I'll definitely make this again, new and improved, and post a few more pictures some time soon.  In the meantime, go with this for now, or substitute your favorite preparation for a 2 pound pot roast yielding fork-tender beef that can be shredded, and you won't be disappointed with the end result.


Pot Roast Sliders
  • 2 lb beef chuck roast, trimmed of excess fat, or top round if you've got one lying around
  • 1 tbsp brown sugar
  • 1/4 tsp dried thyme
  • 1/4 tsp celery seed
  • 1 tsp granulated garlic
  • 1 bay leaf
  • 1/4 C soy sauce
  • 1 cup beef or vegetable broth
  • 1 packet french onion spice dip mix, or soup mix

  • 12 white dinner rolls
  • 1 C mozzarella cheese, shredded
  • 3-5 oz blue cheese crumbles
  • 1/4 C mayonnaise
  • 2 tsp prepared horseradish
  • 1/8 tsp ground black pepper
  • 2 tbsp butter
  • 2 tsp Worcestershire sauce
  • 1 tsp poppy seeds (optional, I didn't have)
  • 2 tsp dehydrated onion, or 2 tbsp minced onion, sauteed in 2 tsp olive oil until slightly browned
  • 1 tsp sugar

If you have time, season the beef with a bit of salt and pepper, and brown it in a skillet.  If not, just throw it right into the bottom of your slow cooker, and cover with the next 8 ingredients.  Cook on high for 4-5 hours, or low for 7-8, until fork tender.  Remove to a casserole and shred with two forks.  If this is done too early, cover with foil and place in a 200 deg F oven with a bit of cooking liquid to keep warm.  Mix the horseradish with the mayo and black pepper to make a slathering sauce for the buns - this will keep them from getting soggy.

Once it's showtime, boost the oven to 375 deg F and remove the meat.  Next, slice your dinner rolls in half and assemble the sandwiches.  On each roll, spread on a layer of the horseradish mayo at least on the bottom half, ideally both halves, then top with shredded beef, mozzarella, and blue cheese.  Close up the sandwich.

Melt the butter in a microwave-safe dish and stir in Worcestershire sauce, poppy seeds, onion, and sugar.  Brush this onto the tops of the rolls.  Cover this with foil, and bake for 10 minutes.  Remove foil and bake for another 10 minutes, then serve.

Sunday, January 26, 2014

Perfect Roast Turkey (Thanksgiving in January series)

I decided to hold Thanksgiving in January, and make a turkey with all of the trimmings.  The last time I made a bird, I had the same problem we all have - the breast came out dry, the legs started to burn, and the thighs were just barely done at the joint.  Sure, there are many workarounds for this - oven bags, brining, deep frying, basting, tenting - but they all have their downsides.  For example, I don't have a spare 5 gallon bucket that I can keep in a fridge for brining, and I want crispy skin, so oven bags are out.  And as for the other tricks, I just never can seem to get them completely right.  Time for physics to step in.

Exactly like my very first post ever, which is about perfect roast beef, the trick that I stumbled on for turkey has everything to do with heat transfer.  If you cook a bird at a high temperature, by which I mean anything 300 degrees F and up, you are exposing the outer layers of the meat to hot, dry air, while slowly forcing that heat down into the center of the bird.  So what do you think happens?  The breast gets way above the temperature you want it, and no many thermal probes you defile your bird with, you still have to make the best scientific wild-ass guess (SWAG) about whether there will be pink flesh at the joints, ruining the meal for everyone but the dog.  Now, a better approach is to cook the bird slowly, at a very low temperature.  This causes two things to happen: first, the temperature of the bird rises more evenly, ensuring that the meat at the joints is cooked without overheating the delicate breast meat.  Second, and possibly more importantly, the bird has time to let the marbled fat and connective tissues slowly break down, self-baste, and become meltingly delicious at the table.  And this is just from cooking at a straight 250!

One last component to this magic is the start to the cooking process.  It turns out that if you just cook at a low temperature, you get a somewhat soggy, boring skin.  The poor beast never has a chance to crisp up at low temperatures.  Once again, science can save the day.  If you start by blasting the bird at 450 for a while - say, 40 minutes - and then lower the temperature way back to 250, you will crisp the outermost layer of the bird, also known as "the delicious skin", without the rest of the meat having any idea what's going on at the surface.  It's exactly like making roasted peppers - char the skins on a hot grill before the flesh inside gets cooked.  Bring the temperature back down after the sear and you're completely safe.

I know that this is the way to go for a variety of reasons, not the least of which was the compliments from my guests.  First, the skin is so good you almost want to just run off with it in a corner and eat it as your whole meal, irritating your guests and letting down the whole family.  Second, you get a better, richer mouthfeel for the turkey, which I believe is from the fat and some connective tissue breaking down in the meat while it cooks over such a long period, almost like a stew would do.  Third, due to the even temperature distribution of the bird, when you pull this out and start carving, the juices don't run all over the place the second you touch it.  This is a good sign that the meat isn't basically clenched tighter than a miser's checkbook after cooking, letting you skip that whole 'rest the bird' nonsense while things even out.  All you need is patience during cooking and a couple of extra hours in the oven.  And a turkey baster.

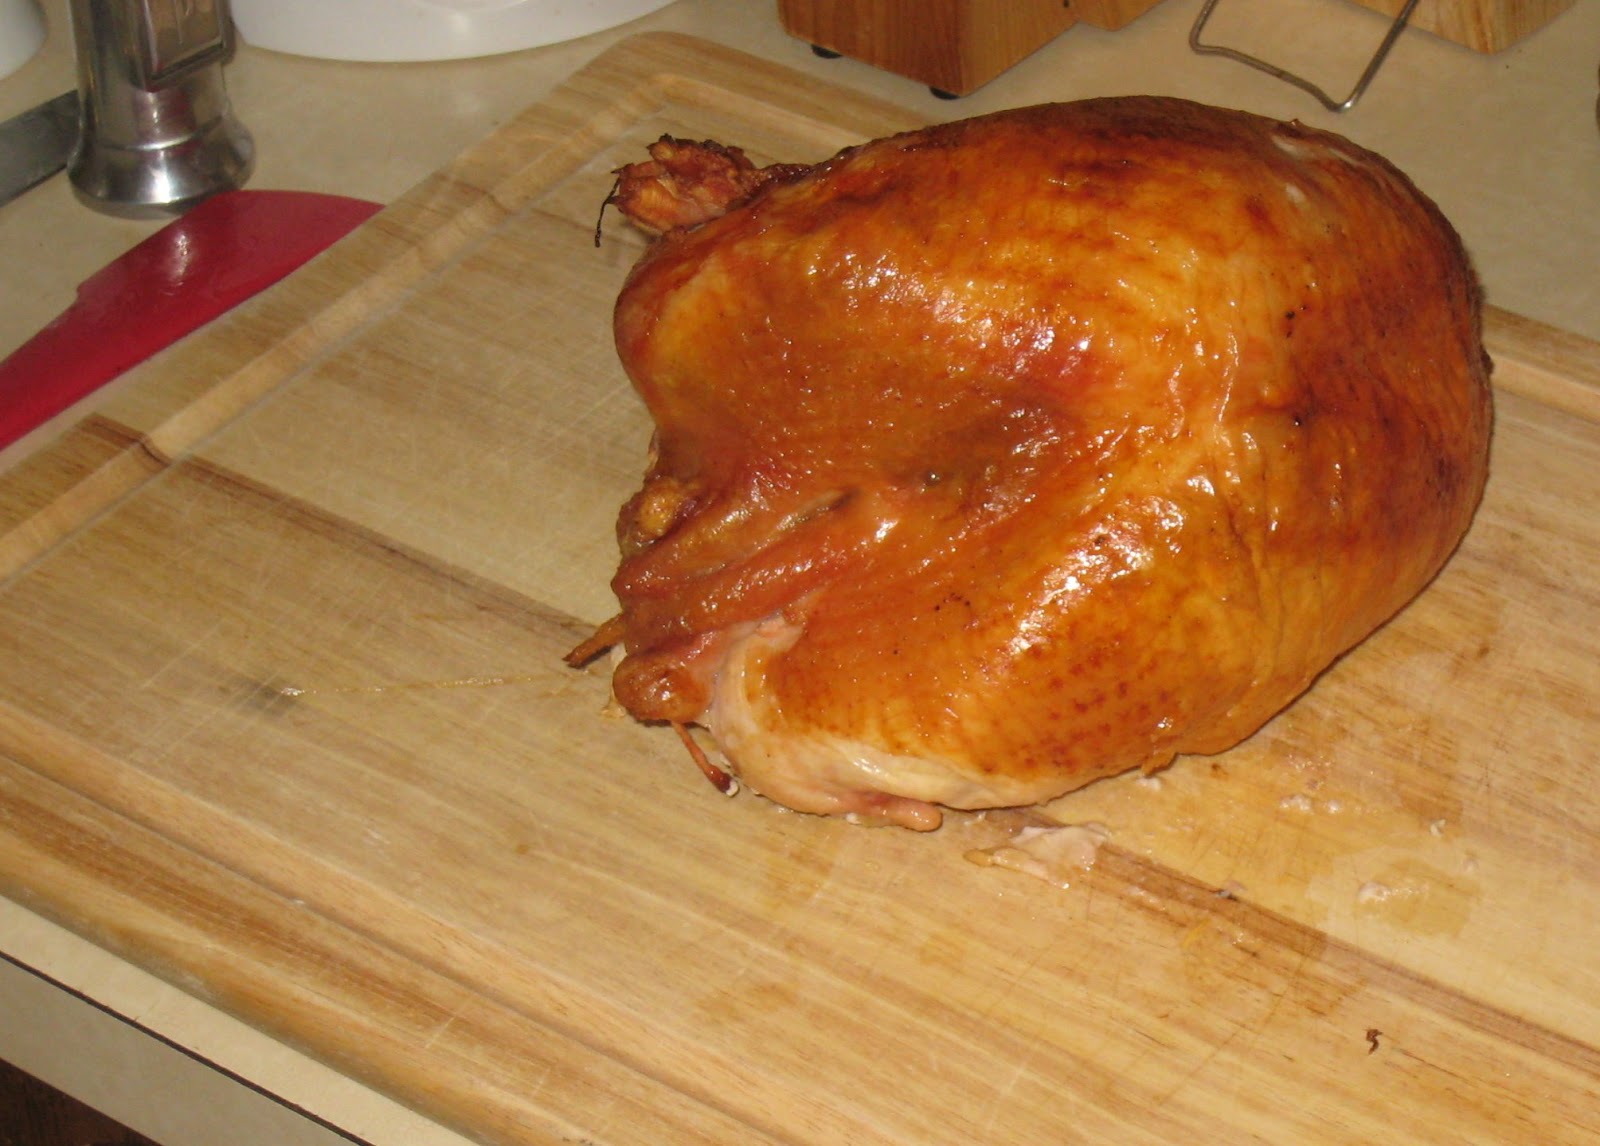
The world's most perfectly roasted turkey, in my opinion


Perfect Roast Turkey


  • One turkey, 12-??? pounds.  I used a 20 pounder for this experiment
  • 1 tablespoon unsalted butter
  • 1 tablespoon extra virgin olive oil
  • 2 tsp kosher salt
  • 1/2 tsp crushed black pepper
For the love of all that is holy, thaw your turkey out before you start this exercise.  I had mine in the fridge for a solid week before even considering this.  Rinse and pat dry your turkey, leaving it on a v-rack for a while to start coming to room temperature, breast side up.  I hacked out the wishbone to ease carving later, but that's not necessary.  Get a long piece of butcher's twine and tie the legs together, and try to tie them to the tailbone to make a denser, less exposed set of appendages.  Meanwhile, set the oven preheating to 450 degrees F.  After a few minutes of air-drying, come back and sprinkle the salt and pepper on the skin and inside of the cavity.  The salt will pull a bit of moisture out of the skin, promoting crisping.  Leave this on for the remainder of an hour on the counter, and then brush the upper and side surfaces with a mixture of the olive oil and the butter, melted in the microwave.

Pop the turkey into the 450 F oven and leave it undisturbed for 40 minutes.  Then reduce the temperature to 250 F and cook until done.  Starting at about the 2 hour mark, every 60 minutes, open the oven briefly and suck out the drippings from inside of the cavity and from the bottom of the roasting pan, setting them aside in a fat separator to make gravy later.  DO NOT BASTE with this liquid, which is actually a terrible idea with this low and slow method.  The turkey will self-baste and can't possibly get dry during the process, and removing extra moisture will promote the dry heat that will keep the skin crisp on all sides of the bird.

That's really it.  I swear.  Start to finish, this took me over 6 hours for a 20 pounder, and it would have taken 7 if I hadn't boosted the temperature at the very end to accommodate my guests' arrival times.  The result?  Completely moist, delicious, fork-tender breast meat, perfectly cooked thighs all the way down to the joints, and the most crisp, most non-burnt skin I have ever made, possibly ever eaten, on a turkey.  Unbelievably impressed with the ease of this one.

Look at that skin.  Tight as a drum, and crisp like a potato chip.

Slice your bird just right, and you can get the breast off in one piece free of all bones, carving it tableside with ample crispy skin for everyone

Update: within a few hours, a whole bunch of people I know are asking about smaller turkeys and chickens.  I believe someone's trying 5 pound chickens tonight, and a 12 pound turkey tomorrow.  Without crunching any numbers, here's my assessment: for a 5 pound bird, try 15 minutes at the higher temperature (450 F), and then lower it to the same low temp - 250 F.  A small bird like that may only take an hour of normal cooking, so 15 minutes can do a lot to something that small.  For a 12 pound bird, I think you could get away with 30 minutes at the higher temp, maybe even more.  I could try to break out my heat transfer textbook, but I would rather rely on first-hand accounts of this.  Hopefully people will post results in the comments, so everyone can learn together (especially me).

Monday, July 29, 2013

Peruvian Chicken (Pollo a la Brasa)

If you haven't had it, Peruvian chicken is one of those hidden gems in the fast food world.  For some reason, we have a ton of different Peruvian chicken restaurants in my town; I'm told it's because we had a lot of Peruvian people come over here from a ministry exchange, and they set up shop all over town.  The history of the dish actually originates with two Swiss-Peruvians who decided to reinvent the rotisserie machine in the 1940s, and this dish took off to the point where it is now one of Peru's national culinary specialties.  The chicken is slow-roasted after being coated with a marinade, usually containing garlic, cumin, and vinegar, but with other ingredients differing somewhat based on where you look.  It is also traditionally served with flavorful spicy sauces such as aji verde, a green chile sauce.

I found this recipe in an old Food Network cookbook, and adapted it with two things in mind - I didn't have a large chicken, and I definitely didn't have a rotisserie.  Instead, I used the same exact recipe with two Cornish game hens, which ended up working out great.  I was amazed that the flavors were so close to those of the restaurant, especially since the cooking method is so different.  Granted, the skin lacked a little of the char flavor and crispy texture that you can't achieve without spinning it over an open flame for a while, but for a homemade version, I'd say this was pretty close for using no special equipment.

A more excellent mix of herbs and seasonings there never was.  Neglect the lime, that's not supposed to be in there.

Sunday, December 9, 2012

Sichuan-Style Steamed and Roasted Duck

Here's a crazy duck recipe I've been sitting on for almost a decade before making - Chinese roasted duck, similar to Peking duck but with different seasoning.  An incredibly popular dish in Chinese restaurants, this is similar to the duck you see hanging in windows in Chinatowns around the world.  Making this dish clued me in to what I was actually looking at - a duck par-cooked to start the process, then basted in a sweet syrup and left to air-dry to ensure a crispy skin before being roasted.  This means that those hanging ducks, while edible, are only part of the way done.  While the process of this recipe is very similar, there are a few things I just won't be able to do, such as cook the duck in a traditional hung oven where it can be roasted over a wood fire.  I'll be trying this recipe again with a different recipe, but this was pretty delicious in its own right.  Not quite the lacquered, crispy skin that made the dish famous in Beijing, but it was really good, and a lot of fun to make.

After a bit of digging, I discovered that the flavors used to make this duck recipe are less like that of Peking duck and more like that of a Sichuan dish, Xiang Su Quan Ya.  That dish is very similar to this but fried at the end rather than roasted, and omitting the glaze.  So this recipe is somewhere between the Sichuan and Peking cooking method, but much more like the Sichuan flavorings given the use of Sichuan peppercorns.


If you haven't cooked one before, duck is really fatty.  There are a lot of things that are done to duck to try to get some of the fat out of it.  You can roast it low and slow to render out the fat while cooking.  Or you can do what the Chinese do, blow air under the skin (somehow, I can only conjecture how this is done) to loosen it and then savor every delicious bit of the crispy skin with a hint of the fluffy, roasted duck fat underneath.  I like the pre-steaming method of this recipe, similar to the other typical Chinese step of boiling briefly but done with more of an emphasis on releasing the fat in addition to shrinking and tightening the skin for a better crispness.  Plus, this duck is crammed so full of aromatic herbs, fruits, and vegetables in this step that even if you put nothing on it and ate it steamed, it would be delicious.

My recipe will modify the process slightly from the original recipe, despite my following the original more closely, to fix a few problems I found with the methods.  It also explains how to make your own Chinese 5-spice, which is amazing but POWERFUL.  A little goes a long way.


Chinatown Steamed and Roasted Duck
Recipe adapted from Tyler Florence, "Food 911: Chinese Take-Out"


  • 1 whole (4 to 5 pound) duck 
  • 2 tsp Chinese five-spice powder, recipe follows (note: very powerful, don't use too much)
  • 2 teaspoons sugar 
  • 2 teaspoons salt 
  • 5 big slices fresh ginger, cut in 1/8" – 3/16” slices
  • 4 garlic cloves 
  • 1/2 bunch green onions 
  • 1 tangerine, peel cut in big strips 
  • 1/4 cup rice vinegar 
  • 1/2 cup honey 
  • 1/2 cup soy sauce
The ingredients, including homemade five-spice powder (recipe follows)

To diminish the fat and produce a crispy skin on your duck, begin by trimming the excess fat from the neck and body - yank out any large pieces from the butt end, basically.  Rinse the duck, inside and out, and pat dry thoroughly with paper towels.  Whether using your own mix or store-bought five-spice, combine the Chinese five-spice, sugar, and salt in a small bowl.  Rub the spice mixture all over the duck, inside and out.  The salt and five-spice powder will draw some of the moisture from the duck so that the spices penetrate.  Stuff the duck cavity with the aromatics: the ginger, garlic, green onions, and tangerine peel.  Fold the wing tips back under the duck and tie the legs together with kitchen string, tucking the tail inside the legs if it's long enough (see picture).  Score the duck breast a few times, piercing the skin but not the flesh.  This scoring step is crucial!


Rub the spice mix inside and out, then toss the aromatics together and stuff them into the duck.  Tell your taste buds to pack a bag, because they're going on vacation.

Score the skin, WITHOUT scoring the flesh.  See how deep I got the cuts?  This lets the fat literally melt out when you steam it.  A really sharp boning knife helps here.

Place a roasting pan on the stovetop over 2 burners and fill with 2-inches of water, turn the heat to medium. Set a V-rack insert inside the pan and lay the duck on the rack, breast-side up. Cover tightly with aluminum foil. Steam the duck for 45 minutes or more, checking the water level periodically. Steaming the duck first melts away some of the fat and shrinks the skin.


Not really captured too well, I wrapped a giant roasting pan in giant aluminum foil, crimping around the edges.  I recommend doing this with the pan cold, for reasons that became obvious to me shortly after starting.

Preheat the oven to 375 degrees F. 


In a small saucepan combine the vinegar, honey, and soy sauce over low heat. Cook and stir for 5 minutes until thick. The duck will be lacquered with the sweet glaze, which caramelizes during roasting, making the skin crisp and brown. 


Whatever you do, don't walk away from the glaze while you're reducing it.  This was seconds after I noticed a near catastrophe and pulled the heat , but you can see along the inside rim of the pot how high up this sticky mess bubbled before subsiding

Take the foil off the duck, remove the rack with the duck, and pour out the water and all the fat that has rendered out (I saved this liquid and ran it through a fat separator, keeping the delicious duck fat, with intentions of making duck fried rice later this week - I recommend you do the same!)  Put the rack with the duck back on a platter or cutting board.  Baste the duck with the vinegar mixture, until all the skin is completely coated in the glaze.  Let it dry to the point that none is dripping off the duck any more - feel free to let this air-dry in the traditional style, hanging if you're creative, for as much as a day!  Now place some parchment or aluminum foil on the bottom of your roasting pan, return rack with duck to pan, and stick the whole thing in the oven.

Baste that bird!  Give it a coat, let it sit for a few minutes, then give it another coat for good measure.
Roast the duck for 1 hour, tenting breast with foil if it gets too dark.  If you're not worried about burning the glaze to the bottom of the pan, feel free to baste periodically with any remaining glaze to set in a deep mahogany color.  I did this, but it ended up making a burnt-on mess that I had to resolve by pouring in liquid, which in turn compromised my duck's crispiness.  The legs will wiggle easily when it's done.  Carve and serve. 


The finished duck.  I ended up pouring a bunch of liquid in the bottom of the pan to prevent dripped baste from burning to the bird, but do as I say, not as I do.  My directions avoid this problem.

Garnish with green onions, and sesame seeds, and serve with rice and some kind of vegetable


Homemade Chinese Five-Spice Powder


  • 1 tsp. ground Szechwan pepper
  • 1 tsp. ground star anise
  • 1-1/4 tsp. ground fennel seeds
  • 1/2 tsp. ground cloves
  • 1/2 tsp. ground cinnamon
  • 1/2 tsp. salt
  • 1/4 tsp. ground white pepper

First of all, never mind that there are seven ingredients here.  Apparently salt and pepper don't count.  Use whole ingredients if you can for maximum freshness, and grind in a spice mill or coffee grinder.  Mix all ingredients in an airtight jar and store in a cool place.

If you happen to cook WAY too much like me, you may actually have all of these ingredients on-hand.  So next time you don't have five-spice, you can actually make your own

Grind all ingredients finely, one at a time to get the amounts right, and stir.  That's it!

Friday, November 30, 2012

Roast Leg of Lamb with Potatoes and Onions


If you haven't tried cooking lamb, you're missing out.  A good leg of lamb is moist, rich, tender, with just a hint of a wild game flavor, and it takes to garlic and rosemary with dignity.  I made this dish years ago and it was so mouthwatering that I ate it out of the tupperware with my bare hands, like an animal, for probably a solid week afterwards.  Not that this is the raving endorsement you should be looking for, but I thought it was a pretty good story.  Cheers to my housemate for taking some very artistic shots this time, but jeers to him for making me realize that I need a better camera.

Ready to be sliced and served

Roasted Leg of Lamb with Potatoes and Onions
(Gigot D'Agneau Aux Pommes De Terre Et Oignons) 
Bon Appétit, May 1999

Serves 6 to 8


  • 1 6- to 7-pound bone-in leg of lamb, excess fat trimmed 
  • 3 large garlic cloves, thinly sliced
  • 1 tablespoon extra-virgin olive oil
  • 1 tablespoon minced fresh thyme or 1 1/2 teaspoons dried
  • 2 teaspoons minced fresh savory or 1 teaspoon dried
  • 1 teaspoon minced fresh rosemary or 3/4 teaspoon dried
  • 1 teaspoon salt
  • 3/4 teaspoon ground black pepper 
  • butter for roasting pan
  • 3 1/2 pounds russet potatoes, unpeeled, cut into 1/4-inch-thick rounds
  • 2 1/2 pounds onions, thinly sliced (about 8 cups)
  • 1 3/4 cups beef stock or canned beef broth 


If you have a food processor, I highly recommend using it to slice the potatoes and onions.  It gives you a perfectly even cut and saves 10 minutes of manual labor.

Ready your root vegetables.  A bed of potatoes and onions serve to cushion the lamb against burning, and absorb the drippings


Preheat oven to 400°F. Using small sharp knife, cut 1-inch-deep, 1/2-inch-long slits all over lamb. Cut up the garlic into thin slices and insert garlic into slits in the lamb. Rub oil all over lamb. Mix thyme, savory, rosemary, salt and pepper in small bowl. Rub herb mixture all over lamb. Set aside. 


Get the garlic deep down into the slits in the meat
Fresh thyme and rosemary really make this dish.  If you don't have fresh rosemary, don't even bother this time.
  
Grease up that lamb!

Rub the herb mixture all over the surface of the lamb

Generously butter large roasting pan. Combine potatoes, onions and stock in large pot (stock will not cover vegetables). Bring to boil. Reduce heat, cover and simmer until potatoes are halfway tender, about 10 minutes. Transfer potato mixture to prepared pan; spread evenly in pan.


Sprinkle with salt and pepper. Bake 10 minutes. Reduce oven temperature to 375°F. Place lamb in roasting pan atop potato mixture. Roast until thermometer inserted into thickest part of lamb registers 130°F. for medium-rare, about 1 hour 50 minutes. Remove from oven. Tent with foil and let stand 15 minutes. 


Thinly slice lamb. Arrange lamb on large platter. Surround with potato mixture and any juices from pan and serve. 


Monday, August 20, 2012

Roasted Turkey Breast with Rosemary Roasted Root Vegetables and Homemade Cranberry Sauce

In an attempt to squeeze more value out of my meat slicer, I've been on the lookout for turkey breasts to roast.  I finally picked up a few on sale, and got a chance to cook one following my standard method.  Roasting just the breast is much more foolproof than a whole turkey, because you don't have to worry about the breast drying out before everything else is cooked through.  All you have to worry about is a single temperature - 160 degrees F.

Yes folks, heed my words - 160 degrees F!  Not 170, not 150, and certainly not 180... unless you're just as happy chewing on the sole of your shoe as you would be eating a delicious, moist slice of white meat.  Keep in mind that the temperature of any large solid object (turkeys, bricks, laundry) will increase at its center at least slightly once pulled from the oven, and you will be perfectly safe pulling a turkey breast out at 160, resulting in a final temperature of about 165.  Even the USDA says you can get away with 165 degrees, so why bother overcooking just because you refuse to live life on the edge?

I will add this - a digital probe thermometer is an absolute necessity for any kind of roast beast.  Dial thermometers are slow, inaccurate, and impractical unless you leave them in the bird constantly.  What's more, I am a hardliner about how I measure my temperature, which I accomplish using TWO probe thermometers; first, a corded digital oven thermometer such as this one, and second, a handheld thermometer, specifically this one.  We have the technology - let science work for you.  The oven thermometer stays in the bird and has a base unit that sits on the counter, beeps to let you know when your roast reaches your desired temperature, and allows you to keep the oven closed.  Consider this - Shirley Corriher says in her book Bakewise that opening the oven door for just 30 seconds will cause the oven temperature to drop by 150° or more, requiring several minutes to come back up to temperature.  So a leave-in thermometer will let you cook your bird faster and more uniformly, without heating up the house.  By the way, my second thermometer just confirms that my first thermometer is working right.  But a third thermometer, now that's just right out.

In addition to my roasted turkey breast, I served a few of my favorite (and arguably required) sides - steamed asparagus, roasted root vegetables, cranberry sauce, and a quick pan gravy.  I'll give recipes for these shortly, but first, a few words on root vegetables: eat them!  They are delicious, and I feel like they are a forgotten staple in the American pantry.  There are so many different root vegetables out there to add body and subtle flavors to otherwise bland foods, like adding parsnips to your mashed potatoes or a side of fried yucca with your burgers.

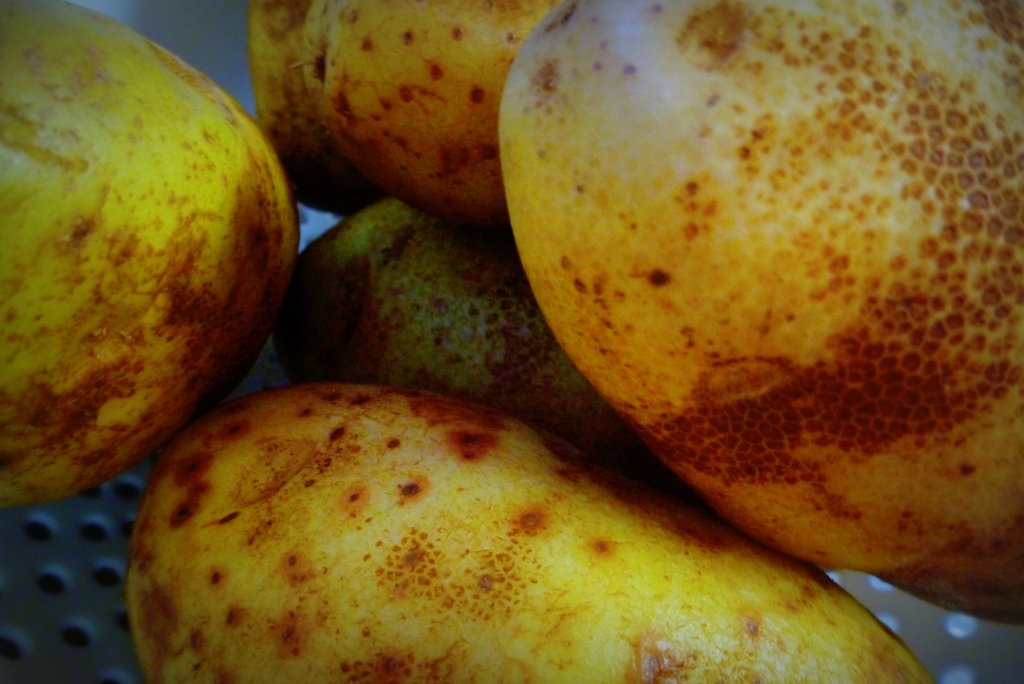
If you are the first person to post a comment back on this site with the correct identification of all the vegetables in the photo, I will let you choose which dish I will cook next.  You present me with three [reasonable] options, and I will pick one of them and make it to the best of my ability.  I will note that, as of 11/21/2012, this riddle has been solved.

 
Correctly comment with the names of all the vegetables and you select what I make next!

Anyway, I found a recipe online for a rosemary-roasted root vegetable dish, so I decided to abandon the exact ingredients and substitute what I could find.  As long as there's some balance in color and flavor, most root veggies can substitute for each other in this dish.

I will only quickly touch on the gravy process, which did not have many stellar pictures.  The cranberry sauce is an old family favorite though, so I will include that one.


Roasted Turkey Breast with Rosemary Roasted Root Vegetables and Homemade Cranberry Sauce

  • One (6-8 pound) turkey breast, thawed
  • 2 tbsp butter
  • 1 tsp salt
  • 1/2 tsp freshly ground black pepper
  • 2 cups chicken or turkey broth / stock, preferably homemade
  •  2 tbsp rosemary, thyme, or sage, depending on your tastes.  I recommend sage here.
  • 3 pounds assorted root vegetables (turnip, rutabaga, garlic, shallots, sweet potato, red potato)
  • 2 tbsp olive oil
  • 1.5 tsp salt
  • 1/2 tsp freshly ground black pepper
  • 1 quart cranberries (or more realistically, 1 bag)
  • 1 cup sugar
  • 1 cup water
  • 1/4 tsp cloves
  • 1/2 tsp cinnamon
  • 1/8 tsp nutmeg
  • 1 tbsp lemon juice

Let's start with the cranberry sauce, since it's so easy.  In a 2-3 quart pot, bring all ingredients to a simmer until berries pop.  Remove the berries with a slotted spoon, and continue boiling the remaining syrup until it is reduced by 1/3 to 1/2.  Transfer everything to a bowl, and refrigerate until set.  That's it!

Now, onto the turkey.  Preheat oven to 350 degrees F.  In a small bowl, melt butter.  Rinse turkey and place on a rack over a roasting pan.  Why use a rack?  Because otherwise it will stick to the pan and not cook evenly, and the bottom will come out gross.  If you have time to leave the bird out at room temperature for 30-60 minutes, do so.  This will make for more even cooking, and make sure the bird is dry before going into the oven, ensuring a good crisp skin.  RIGHT before you put it in the oven, season with salt and pepper, both inside and out.  Then pour the melted butter on the turkey, rubbing it onto the skin on all sides.  This makes for a deliciously browned, crispy skin texture that's, well, it's just great.  Finally, pour the broth around the bird in the roasting pan.  You can use this to baste the bird if you like, or it will just hang out and infuse more flavor into the bird, keeping it moist.

Preparing the turkey breast for roasting.  Butter has already been rubbed into the skin.

Insert a probe thermometer into the thickest part of the breast, away from the bone.  Set the temperature alert to go off at 160 F, as mentioned above, and pop your roasting pan in the oven.  You'll notice the temperature shoot up a lot at first, and you may think this rate will continue throughout the cooking.  Well unfortunately, the laws of thermodynamics are a harsh mistress, and you should see the temperature increase slow down as the bird approaches doneness.  I've had it look like we'd eat in 10 minutes, but it took 30 to finish!  Expect it to take about 1.5 - 2 hours total to roast a 6-8 pound bird.

Meanwhile, contemplate your roasted root vegetables.  I have a different recipe where you put them in the pan with the turkey, but this time I'm going for plain turkey that goes on sandwiches afterwards, with no notes of anything vegetative in the turkey.  So peel and chop your veggies into evenly sized bites, roughly 1" cubes or slices if you prefer.  I went for a mix.  Place these on a baking sheet lined with aluminum foil, or better yet, parchment paper, and toss the vegetables with olive oil, salt, and pepper.  Don't add the herbs (sage or whatever) just yet - wait 30 minutes before adding them, or they will burn and become bitter.  The olive oil is essential for conducting heat into the vegetables, which would otherwise just burn on the edges and bottoms, and get dry and weird everywhere else.

Put them in the oven when you think there will be roughly 1 hour left of turkey cooking time (30-45 minutes after you start the bird), and stir them every 20-30 minutes.  After 30 minutes, go ahead and add the chopped herbs.  Sage pairs well with turkey; rosemary and garlic not so much.

Prepped root vegetables, awaiting my further pleasure.

Once your bird is at 160 degrees, remove it from the oven.  I'll bet you think you're done, right?  Wrong.  You have to let the bird sit, to contemplate its existence for a while.  The bird is, understandably, pretty ticked off right now, and is ready to just blow up at you for throwing it into a hot oven after a stay in a perfectly good refrigerator.  If you plan to tent it with tinfoil, do so loosely, or else the steam will make the crispy excellent skin into something more like rubbery onion peels.  During this poultry meditation ritual, the bird will relax, and, being less uptight, will let its juices distribute evenly throughout.  Cut the bird too soon, and juices will run all over your cutting board and onto the floor, and the bird will be dry.  But if you wait 15 minutes, you will get a moist, succulent bird, still very warm, which has retained its beautifully crisped skin.

A roasted turkey breast in somber meditation before carving

As the bird is resting, finish roasting the root vegetables.  If they're not yet browned, give them another stir, crank the oven to 400 F, and keep going.  You want them to be slightly browned, not burned, and not just cooked through.  The browning is what brings out the caramelized sugars, which is really what you want in terms of flavor development.  It also gives the vegetables a pleasant crunchy texture, as opposed to one of baby food.

The finished roasted vegetables

If you want to make a gravy, you have three options:

  1. Use the weird bag of gravy that came stuffed into your turkey from the store (not advised)
  2. Stir up the pan drippings with white wine or cold broth and make a pan sauce (use when you have only a little liquid in the pan)
  3. Collect all the drippings, separate the fat, and make a traditional gravy (use when you have more than 1 cup of liquid in the pan)

I tried for option 3, but it didn't work out as I had hoped.  So I will table the gravy discussion until another article, most likely some time around November.

The end result, however, came out to be a festive pre-Thanksgiving feast.  The turkey was moist, the vegetables crispy and full of flavor, and the cranberry sauce refreshing.  All in all, this wasn't a very exhaustive meal to make until I made the gravy, which I find to always be the extra cooking step that turns a fun evening into an aggravating one.  So if you can live without gravy, this whole process should take less than 15 minutes of prep time and only minor monitoring throughout, with the end result being pretty spectacular.

The finished meal, seconds before I finished it.

LinkWithin

Related Posts Plugin for WordPress, Blogger...