Showing posts with label beef. Show all posts

Wednesday, October 15, 2025

Texas Hot Links

When I think of BBQ, I picture ribs, brisket, pulled pork, maybe the oddball turkey breast. If you asked me "what defines Texas BBQ", I would probably have said beef ribs. But apparently there's a kind of smoked sausage there that I have been missing out on for my whole life, called a Texas Hot Link. It's a beef sausage, cured and smoked, a bit like a NY style "half smoke" but I think a bit more spicy and probably quite a bit more heavy on the smoke. Twice as smoked, if you go by just the name. I had the good fortune to try this recently while enjoying a combo plate we know as a "hog bucket" at our local BBQ restaurant, and was instantly a fan. So of course I had to try making this at home, because all rational people decide to make forcemeat dishes when they find ones that taste good, right?

Searching for a recipe pulled up more colorful names for this - hot links, hot guts, and also just "guts". Not the best name, hopefully that's not how you would have to order a sausage platter in, say, Austin, though that probably wouldn't be the strangest part of your day even if that's what it came to. But the general premise seemed easy enough - grind up fatty beef with spices and a curing salt, stuff, rest overnight, smoke, feast, food coma. Done. Sounds easy, right?

Well, not so much. This turned out to be an exercise in not having the right equipment at the right location. I was looking forward to using my sausage stuffer, but discovered that the tubes weren't in the box, and after tearing the house apart concluded that they were donated along with an old meat grinder. So getting the meat into the casings required two people wrangling equipment, shoving with full force down the throat of a KitchenAid meat grinder, which was woefully inadequate and kept getting gummed up. I also had no good way to hang the sausages in the smoker, and the makeshift rack caused the links to slip down and knock into each other, slowing things down and causing uneven smoke coverage. Finally, the probes to my thermometer weren't the thin kind that I could leave in one of the sausages, so I kept opening the smoker every hour or so to poke at them as I became increasingly starving, annoyed, and frankly, hostile towards the unsuspecting links. They didn't cause this.

In the end, the two day experiment put dinner on the table at a reasonable 10:30 at night. But all of the frustration melted away into greasy, spicy, smoky bliss after trying just one bite. I would say this was a huge success, and plan to make a much larger batch for a party, since this should scale pretty well in the right smoker. And the smells in the house even the day after carried happy memories of sausages past, which was a nice bonus to wake up to. I will say that for adults, the flavor is great, but for kids, I'd knock down the amount of cayenne, which was pretty intense.

Last time we bought these from the restaurant, any survivors from the initial dinner ended up in a sausage, kale, and potato soup, which we will make soon and post with stragglers from the current batch.

Here's the list of crazy tools I used (or should have) to make this work:

  • Stand mixer
  • Meat grinder
  • 5- to 10-pound sausage stuffer
  • Vertical smoker with offset smoke chamber
  • Needle tip probe thermometer
  • Very precise kitchen scale
  • Spice grinder
The other thing I highly recommend is a pack of Instacure #1, also known as Prague Powder #1. This is the curing salt that is used in making hotdogs and other cured meats, and it's incredibly unsafe if handled wrong, possibly fatal if consumed plain, maybe toxic, and makes for totally delicious sausages. Follow the directions for its use exactly! 5 lbs of meat translates to just under 1 tsp of this curing salt. I happened to have some from back in my sausage-making days after taking a butchering class in college (land grand schools rock!), but if this product is new to you, don't be scared of it, but do be careful.

The recipe was lifted almost verbatim from the Thermoworks website minus the use of ground mace, which we were out of.

After 4 hours in a 200 F smoker

The finished product. I think the color is about right, but I'm no expert

5-pound vertical sausage stuffer. Not helpful when you LOSE THE STUFFER TUBES!!! Ugh.


The setup - heavy on the spices and equipment on this one

Be careful with the curing salt (the pink-colored salt at about 11 o'clock in this photo)!

Mixing the meat and spices with water will unravel the proteins and make a good paste for stuffing. Not the best for getting through the grinder chute, but good once it's in the casing. If only I had a sausage stuffer....

Thread the casings onto the stuffer tubes, tie a knot, and go wild. Oh, and good luck finding casings this century - had to go to many grocery stores before I found them. Check with a butcher if you have one nearby, or order online if you don't.

I twisted these as they came off the tube, but you could do one long rope and then twist. Spin in alternate directions or they will unravel. Keep pressure on the casings still on the tube to control the fill speed, and poke holes in the filled sausages with a toothpick to pop air bubbles, as needed.

Ready to be rested overnight in the fridge to cure

24 hours after stuffing, into a 200 F smoker for 2-4 hours

Towards the end of smoking. The color doesn't reflect the finished product in the first photo.


Texas Hot Links
Modified slightly from Thermoworks.com blog post

  • 3 lb lean beef eye of round is perfect. Or use 80/20 ground beef.
  • 1 lb beef fat not rendered, such as brisket trimmings. I used very fatty pork belly, since I don't have a good butcher at the moment
  • 6 g paprika (NOT smoked!!)
  • 8 g cayenne pepper (maybe less if you want a more family-friendly flavor)
  • 5 g mustard powder (ground fresh in the spice grinder)
  • 7 g garlic powder
  • 5 g onion powder
  • 25 g ground black pepper (ground fresh in the spice grinder, though I've read to maybe do some fine and some coarse)
  • 90 g dry milk powder, used as a binder
  • 40 g salt
  • 5 g Prague powder #1 AKA Instacure #1 curing salt. My packet's instructions quote this as just under 1 teaspoon, which is what I use for a 5 pound batch of meat.
  • 1 ½ cup cold water
  • Hog casings
Cube and chill the beef and beef/pork fat, then chill them in the freezer for about 30 minutes, alongside your grinder. Grind with a medium disc into a bowl set into a larger bowl of ice.

Mix the seasonings, milk powder, and cure together in a small bowl. Put the meat into the bowl of a stand mixer, and sprinkle on the cure/seasoning mix. Make sure the meat is still below 40 °F.

Mix the meat with the paddle attachment, adding the water as you go, until it forms a sticky, fibrous mass that clings to the walls of the mixer and the paddle.

Stuff the meat into casings (not too tight or they will burst!) and twist it into links. Pop any bubbles in the casings with a toothpick as needed.

Allow the links to sit, uncovered, in the refrigerator overnight to cure and dry out just a little.

The next day, preheat your smoker to 200°F. Put the sausages in the smoker, insert a needle probe into one of them if you have one, and close the lid. Cook to 155 - 160 °F. It should take a few hours.

If saving the sausages for later, plunge them into an ice bath to chill and stop cooking. Otherwise, slice and eat fresh off the smoker.

Saturday, May 3, 2025

Beef and Bok Choy Over Crispy Air-Fried Noodles

Jump to recipe

When I was growing up, there was a Chinese restaurant near me that served a few different stir-fries served in a "bird's nest". Although actual birds' nests are a thing, this is not what they served - it was shredded potatoes shaped into a bowl and then deep fried, usually served with a mix of seafood and vegetables in a rich, light colored but very garlic-heavy sauce. The dish has a lot in common with some versions of chow mein, which in some preparations is a bed of really crispy noodles with a very heavily sauced stir-fry plated over the top. Both are great, and the consistency is what really wins me over - crispy on the edges, but chewy and loaded with flavor as you work your way in, and as the noodles start soaking up the sauce from the outside in.

To try to replicate this, I bought a nest-frying tool, which is a strange contraption of two concentric hemispherical baskets that clamp together, and you load up the volume in between with potato and then deep fry the whole thing. Naturally, I've never used it. Instead, I've tried to make the noodle version of this dish a few times with minimal success, mostly because the crispy noodle cakes that serve as the foundation usually come out both squishy and burnt when trying to get heat into the center of a cake of pre-boiled noodles. On a recent attempt, after having a fit about ruining too many noodles, I gave up in a fit of rage and threw a small quantity of the noodles into my air fryer, which turned out to be the magic step - this turned a disaster of a process into a really easy one. And then today, based on a recent attempt at making a few Thai noodle soups from Serious Eats, I borrowed a technique where you make a garlic-infused oil and then use that as the oil to coat the noodles in, prior to air-frying. The result was better than any version I've had in a restaurant.

The toppings for this crispy noodle cake almost don't matter as long as there's enough of a decent, garlicky sauce to work its way into them at serving time. I tend to lean towards a beef with oyster sauce, so I liked the version that combines beef and bok choy from Omnivore's Cookbook, adapted to what was in the garden, and using some leftover rare rib roast and only lightly stir-fried. It's infinitely adaptable, so long as there's at least a cup of a thickened sauce to go over the noodles. If you get the timing just right, serving over the hot, freshly fried noodles will get them to sizzle audibly, and start soaking up that goodness right before you start eating.

A word on ingredients - use decent stuff. There's a good amount of oyster sauce in this, and Shaoxing wine is used in a couple of steps. Try to get a good quality version of these two things, which both make a difference. Try to find an oyster sauce that's actually got "oyster" as the first ingredient, and look for a wine that's got less salt and might be labeled "hua diao" or has aged a bit. This is going to change the flavor immensely, and took me a long time and many mediocre stir-fries to realize.

These are the versions of the key ingredients that I keep on hand. And yes, that's Japanese soy sauce, not Chinese.

Monday, February 15, 2016

Lasagna-stuffed spaghetti squash: a fun alternative

If you're looking for a way to take something totally unhealthy and turn it into something only mildly unhealthy, then look no further! This recipe converts the standard lasagna into one that uses spaghetti squash, a fun winter squash that pulls apart into threads (not unlike spaghetti) once sufficiently cooked. It may leave you wanting a bit, given the lower calorie count, but at least you won't hate yourself as much later that night. Plus, it's incredibly fun to eat.


Monday, January 18, 2016

Vietnamese Lemongrass Beef Salad (Bun Bo Xao)

One of the most common Vietnamese dishes is some form of grilled, marinated beef served on, in, or at least near some rice noodles. Just like tex-mex food in Jim Gaffigan's words (tortillas with meat, cheese, or vegetables), bun bo xao is one such construction of beef with rice noodles and cilantro, and is on almost every Vietnamese menu other than at pho restaurants. I've made pho before, but have actually never made this dish until now. It turns out that not only is it somewhat simple, it's also incredibly delicious, and replicates the restaurant version almost identically.

I made this dish by merging a few different recipes, some coming from the very excellent book Vietnamese Street Food, by Tracey Lister and Andreas Pohl. The key components of the dish are the lemongrass marinated beef, the raw salad components, and the seasoning sauce, nuoc cham truyen thong.


Sunday, July 13, 2014

Oxtails Braised in Red Wine

When I was in college, my friend and I took a trip to Atlantic City for the evening.  We didn't have much of a plan, we just went there and figured we'd do some gambling and drinking, and then head back.  Before we went off to lose our shirts, we looked around for a decent restaurant, and found a Cuban place called Cuba Libre.  It's still there, by the way.  So we sit down to eat, and we each decide to order some kind of oxtail stew they have on special, figuring that it would be interesting.  I hadn't had oxtail before, and thought it might be a great place to check it out, having fondly remembered a number of other Cuban beef stews.  But it wasn't just interesting - it was delicious.  So much so that we cleaned our plates from this massive feast, which included not only a healthy quantity of meat but also rice, plantains, and a variety of other things that have since disappeared into a haze of pan drippings and caramelized vegetables.

We never gambled that night - we stumbled into the casino, half-drunk on meat, and played slots for 5 minutes before we decided to turn back.  On a whim, I put $40 on red at a roulette table which hit and, having recovered the cost of my dinner, realized that we had won that night, big time.

This recipe is the first of two oxtail dishes that I will make - this being the more simple, more American version, cooked down slowly with red wine and root vegetables, and a future recipe being the Cuban oxtail stew, or rabo encendido.  I just found this version on the New York Times recipe page and gave it a shot, replacing a non-latin variant on this recipe I made years back because this had more wine in it, and let's face it, that's going to make it much better.  Turned out to be a winner, although it doesn't hold a candle to our Cuban feast that night.

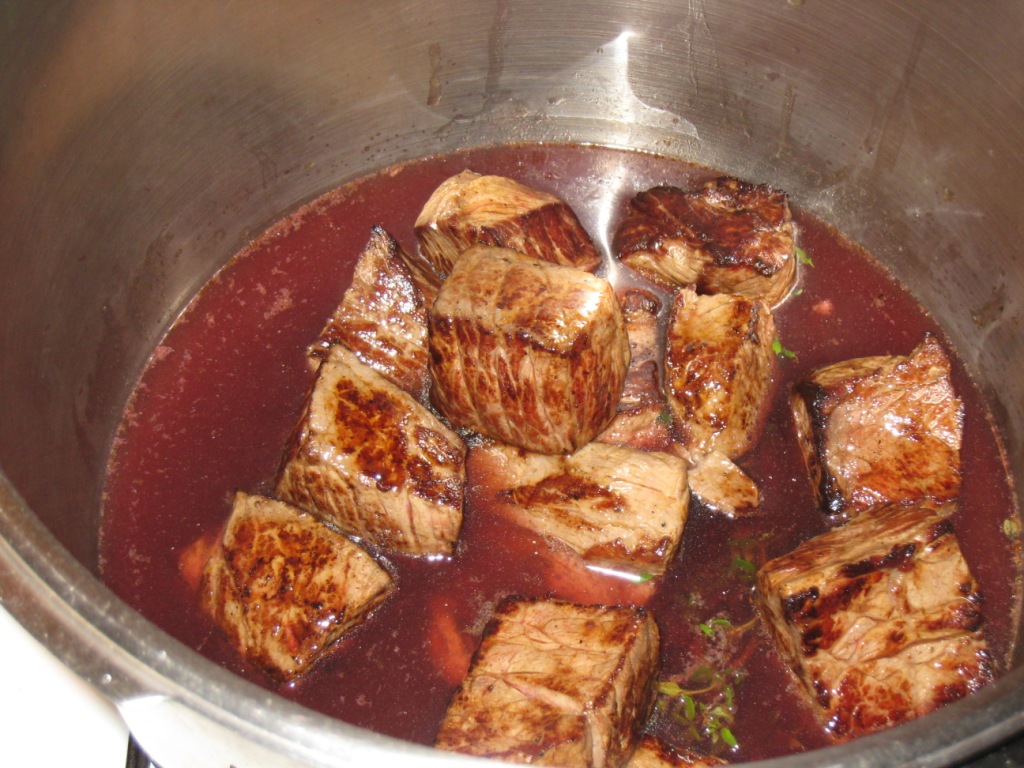
Every bit as delicious as a chuck roast or short rib stew, if not more so.


Wednesday, July 9, 2014

Nikujaga (Japanese Beef and Potato Stew)

I don't remember where I found the book on slow cooker dishes that contained this recipe - it was collecting dust in someone's house, and I was bored and flipping through to pass the time.  While looking at soggy chicken stews, and "stir-fries" that you cooked 8 hours, I was despondent.  But somewhere in the back, buried way beyond the potato soups and the poached fish with mustard dishes, and just before the wine-soaked pears, I found this gem, which is most definitely authentic, and which does very nicely in the slow cooker.
Nikujaga is an interesting dish if you know Japanese food, mostly because it's got a lot of western influence.  I can't name too many Japanese dishes that have whole potato chunks - possibly golden curry, and some kind of croquette called a korokke, which I may now have to make after having looked it up.  But I assure you, mention Japanese beef and potato stew to someone from Japan and they will say "NIKUJAGA!!", which I have tried a couple of times with great results.


I really like the flavors in this dish, which is slightly sweet, very rich, and incredibly filling and warming.  And there's very little to this process - you chop everything, throw it in the slow cooker for the day, and come back later to eat a delicious meal.  I first tried this in the pressure cooker, which took an hour, and then tried it in the slow cooker, which took 6-8 hours, and which I thought tasted nearly identical but was ready when I walked in the door.  Your call.  Also, if you really want to get fancy, brown the meat first in a bit of olive oil, and then continue.  It will be notably better, although totally non-essential.


Tuesday, March 18, 2014

Fresh Pho Bo. Or, How I Turned 6 Pounds of Bones into Pure Awesome

12/10/12: Not too long ago, when I was just getting started with this whole blog thing, I was still posting some recipes that, to most of us, would appear sane.  This included a recipe for 'fast pho', cutting out the longer steps of pho creation so that it could be made in about 45 minutes.  But sometimes you have to throw hours at a dish, just to know what it could be if you didn't get lazy.  This recipe is that result.  Real, no kidding pho, just like what you can get for a few bucks at most Vietnamese restaurants.  Why would I do this at home, you ask?  Because I am, as they say in Vietnam, off my nut.

Update 3/18/14: it's been 15 months since I posted this, and I've now made this dish 3 times with increasing success.  This time we discovered the convenience of buying the pre-sliced beef from the Asian grocery store, along with the correct pho rice noodles for the first time, which come vacuum-sealed in the refrigerated section, and are ready to go as soon as you dunk them in the hot broth for 5-10 seconds.  Saved tons of time in the serving stage, and the only real effort was in the stock making, which has become a fairly painless process that we did while we had company over.  So maybe you don't have to be crazy to do this after all.


If I had no job and no other hobbies, I would stay in and make things like this all the time.  Unfortunately, like many of us I don't often have time to sit around for 6 hours and cook this dish.  Which is too bad, because this pho is as good as any restaurant's, and I know exactly what went into mine.  Fresh ingredients, very little salt, lean meat, and a mix of exotic and common spices and sauces.

I want you to make this recipe.  I really do.  And post on here about your experience.  Tell me what you changed, what you used.  I'll try to make it easy for you to follow, but it's still a long process that requires some special equipment and ingredients.  Most likely, you'll need an Asian grocery store nearby to even entertain this idea.  Here's what else you'll need, in decreasing order of cost:
  • A meat slicer, a really sharp knife, a friendly butcher, or a decent Asian grocery store
  • A large (3+ gallon) pot
  • A second large (2+ gallon) pot
  • A large colander or strainer
  • A fine mesh strainer spoon or skimmer
  • Cheesecloth
My recipe is adapted from a collection of different recipes I found online, complemented by techniques from my earlier fast pho recipe, and adjusted based on taste testing during cooking.  If you don't like it, reply and tell me why not.  I'm probably going to make it again, on a day when it's cold and rainy and I'm trapped in the house, much like this adventure.


Beef Pho (Pho Bo) Vietnamese Noodle Soup
Inspired by Viet World Kitchen, cobbled together by me


The stock:
  • 3 medium yellow onions (about 1 pound total)
  • 4-inch piece ginger (about 4 ounces)
  • 5-6 pounds beef bones (marrow, knuckle, calf's foot) - look for some variety, and bits with tendons that will break down, as opposed to just bone
  • One 8" daikon, peeled, cut into 5 large chunks
  • 15 star anise
  • 8 whole cloves
  • 3-inch cinnamon stick
  • 1 tsp whole black peppercorns
  • 3 tbsp salt
  • 6 tbsp fish sauce
  • 2 tbsp sugar, or 1 ounce yellow rock sugar (duong phen)

The dish:
  • 1.5-2 pounds small (1/8-inch wide) dried or fresh banh pho (rice stick) noodles
  • 1/2 pound raw eye of round, brisket, sirloin, or other tender, lean beef, sliced very thinly across the grain
  • Thai basil (hung que)
  • Cilantro
  • Bean sprouts (about 1/2 pound)
  • 1 jalapeno, thinly sliced
  • Lime wedges
  • Hoisin sauce
  • Sriracha sauce

The setup.  Are you kidding me, look at all of the bones!

Char onion and ginger.  Cut your onions in half, peel off the papery outer layer, and set over an open flame with the unpeeled ginger on a grill or gas stove.  I repurposed the rack from my oven and placed over the gas burners to make a large cooking surface.  Let the skin burn, rotating occasionally.  After about 15 minutes, they will soften and become fragrant.  Let cool, and rub off the blackened parts off the onions under running water.  Peel the ginger.  Set aside.

Char the root vegetables over an open fire

After you char the vegetables, rub off some of the blackened char and throw this into the stock

Parboil the bones to clean off 'impurities'.  This was a commonly encountered step online, so I didn't skip it.  Place bones in large stockpot (minimum 12-quart capacity) and barely cover with cold water.  Boil vigorously over high heat for 2 to 3 minutes.  Now dump the bones into a colander and rinse with warm water.  Scrub out your pot and return bones to the pot.

Rinse dem bones!

Now make your soup base.  Make a small herb pouch by placing the cinnamon, cloves, peppercorns, and anise in cheesecloth and tying into a pouch - this will prevent excess grit from accumulating in the soup.  Toast your spices in a dry saute pan before putting them into the soup, which really brings out their flavor.  Put the bones, the herb pouch, the onions, and ginger in the stockpot, and add 6 quarts of water.  Bring to a boil over high heat, then lower flame to a simmer (not a boil).

Toast your spices in a dry pan to bring out extra flavor
You know you want a pouch like mine.

For the next hour or so, use a skimmer every 10 minutes to remove any scum that rises to surface.  What happens if you don't skim this?  You get all kinds of weird protein foam that bubbles up, called "colloidal juice".  And since this looks about as appetizing as it sounds, you probably don't want this in your soup, because if you leave it it will dissolve back into the stock, making it cloudy.  It's also got some of the fat and impurities in it according to the CIA, so it pays to grab it and get it out of there.  But the jury is out on whether that last part is true or not.  Anyway, here's what I'm talking about:

Got a skimmer?  If not, consider investing in one if you make stock.
Every 10 minutes or so, get that foam out of there.  It will go from this...
...to this.  Much better, isn't it?  Trust me, it will pay off big time by being clear and delicious

Skim and continue simmering for a total of 90 minutes, then add the daikon and continue cooking for another few hours.  How long?  Until you're tired of cooking it, that's how long.  I would say a minimum of 3 hours, and a maximum of 5 (total, not from this point).  While cooking, taste periodically and adjust seasonings thusly - if it's too bland, add more salt, 1/2 tbsp at a time.  If it's not tart enough, add more fish sauce, 1 tbsp at a time.  If it's too tart, add more sugar, 1 tsp at a time.  You want it a bit concentrated, because you'll be adding unseasoned ingredients to the final product, like noodles and sprouts.  Don't worry if it tastes a little salty, this will cancel out the fact that you're adding a ton of unseasoned beef and noodles at the end.  When you're comfortable with the finished product, pour out the broth through a colander into a medium (2 gallon) stockpot to remove the large solids, then pour back to your large pot and, in the process, strain through a strainer lined with cheesecloth.

This is what was left of those bones.  What was once collagen is now a delicious gelatin dissolved into the soup base, good for strengthening your nails and making your soup deliciously rich and unctuous.  Word of the day!

If you're impatient, go ahead and continue to the next step.  Go on, do it.  I won't judge you.  But if you can afford to wait a day, you can let the soup base cool down, and have all of the fat rise up to the top for you to scrape off and discard.  If you did things right, this broth will have enough gelatin to choke a horse, and will look like it should be served in a small glass bowl at the hospital.  It would probably make the patients feel better, I tell you what.

This is the soup, cooled down with fat removed.  It is not moving at all in this picture.

When ready, assemble pho bowls.  This is where you can screw up and get yourself in trouble.  What happens next is a bit of cooking (and thermodynamics) magic, wherein raw meat is instantly cooked by pouring scalding hot broth all over it.  So you want the meat to be paper-thin, and you need for there to be enough thermal mass between the broth, the noodles, and the bowl to ensure that the meat gets cooked.  How much mass?  Well, I could get out my heat transfer book and tell you to within a few ounces, or we could just go with "a lot of broth", which is a slightly less scientific but still valid answer.

Slice your raw beef of choice as thin as you can get it.  A meat slicer comes in handy.  Shoot for something the thinness of deli roast beef.  Before slicing, chill the meat for 15-60 minutes: more if you have a real slicer, less if you're going at it by hand like some kind of tissue dissection.  Either way, set it aside and let it warm up a bit.

Got a meat slicer?  Hope so.  If not, talk up your butcher and see if they can cut it like this.  Also, most Asian grocers carry pre-sliced beef round in the frozen section, ready to go specifically for this purpose

Heat the pho broth to a boil, and prep your noodles.  Get two pots going - one with just water for the noodles, one with the broth.  Follow the directions on the noodle package, which will basically tell you to soak in hot water for 15 minutes, rinse, and then throw into a pot for a few minutes, until cooked.

Prep your sprouts and noodles

Heat up some bowls in the microwave, ensuring they are plenty warm before you start.  You really want to get a lot of heat into this, so the meat cooks.  Put a serving of noodles into the bowls.  Next, throw in bean sprouts, which you can cook for 30 seconds in your noodle water to take out some of the raw flavor, and warm them up.  Place in the bowl, or on the garnish plate.

Now add your meat - place the thin strips over the top of the noodles.  Pour the boiling broth over and watch the magic... the meat will cook instantly as you pour, turning from red to gray.

Prep for this really cool process by laying out the raw meat over the cooked noodles.  Then just pour on the boiling broth...

...and watch the fun!  Want to see it again?

Before...

...after.

Serve your pho with a garnish plate consisting of cilantro, bean sprouts, jalapeno slices, and Thai basil.  Also set out hoisin sauce and sriracha (not homemade, sorry) to pour in.  Now savor every bit of your hard work, or that of the person you bribed into making this for you.


And with that, I'm tired.  I'm going to bed.

Tuesday, February 4, 2014

Slow Cooker Pot Roast Sliders with Blue Cheese

Okay, here's a quick one with only one picture - sorry, I'm the worst blogger ever sometimes.  In my defense, I was trying to throw a party, which went over much better once I served everyone some pot roast sliders.  And that brings us to the recipe, which I found online and modified slightly to improve the flavor and healthiness, and also to use what I had available.  I'll note that the original recipe called for chuck roast and I used top round, which is MUCH more lean and probably didn't have quite the same flavor or moistness as would have been found in the original, but it was still delicious, meaning this is pretty forgiving.

If I had it to do over, I would brown the meat, and would definitely use chuck roast to get something a bit more moist and rich, but I was pleased with the immense amount of flavor these sandwiches had, most of which happened to come from the pungent blue cheese paired with the tender threads of a mild, tender beef.  I'll definitely make this again, new and improved, and post a few more pictures some time soon.  In the meantime, go with this for now, or substitute your favorite preparation for a 2 pound pot roast yielding fork-tender beef that can be shredded, and you won't be disappointed with the end result.


Pot Roast Sliders
  • 2 lb beef chuck roast, trimmed of excess fat, or top round if you've got one lying around
  • 1 tbsp brown sugar
  • 1/4 tsp dried thyme
  • 1/4 tsp celery seed
  • 1 tsp granulated garlic
  • 1 bay leaf
  • 1/4 C soy sauce
  • 1 cup beef or vegetable broth
  • 1 packet french onion spice dip mix, or soup mix

  • 12 white dinner rolls
  • 1 C mozzarella cheese, shredded
  • 3-5 oz blue cheese crumbles
  • 1/4 C mayonnaise
  • 2 tsp prepared horseradish
  • 1/8 tsp ground black pepper
  • 2 tbsp butter
  • 2 tsp Worcestershire sauce
  • 1 tsp poppy seeds (optional, I didn't have)
  • 2 tsp dehydrated onion, or 2 tbsp minced onion, sauteed in 2 tsp olive oil until slightly browned
  • 1 tsp sugar

If you have time, season the beef with a bit of salt and pepper, and brown it in a skillet.  If not, just throw it right into the bottom of your slow cooker, and cover with the next 8 ingredients.  Cook on high for 4-5 hours, or low for 7-8, until fork tender.  Remove to a casserole and shred with two forks.  If this is done too early, cover with foil and place in a 200 deg F oven with a bit of cooking liquid to keep warm.  Mix the horseradish with the mayo and black pepper to make a slathering sauce for the buns - this will keep them from getting soggy.

Once it's showtime, boost the oven to 375 deg F and remove the meat.  Next, slice your dinner rolls in half and assemble the sandwiches.  On each roll, spread on a layer of the horseradish mayo at least on the bottom half, ideally both halves, then top with shredded beef, mozzarella, and blue cheese.  Close up the sandwich.

Melt the butter in a microwave-safe dish and stir in Worcestershire sauce, poppy seeds, onion, and sugar.  Brush this onto the tops of the rolls.  Cover this with foil, and bake for 10 minutes.  Remove foil and bake for another 10 minutes, then serve.

Sunday, March 11, 2012

Beef Stroganov

I had some friends in town and decided to make this recipe, which I'd been saving for a while.  It was a lot of fun to make, because it involved some of my favorite things - fire, large hunks of meat, steam, and cast iron.  Taken out of context, this might mean I'm either ready to wage war or check myself into a ward, but at least in the kitchen this makes sense.

I did a bit (translated: 4 seconds on Wikipedia) of research on this dish, and discovered first that it should probably be called Stroganov, and not Stroganoff, because it's most likely named after the Russian family of that name, and therefore giving it the French spelling with the 'ff' is pretty much a slap in the face to this family, and might kick off another Cold War.  The dish is typically a meat stew, either beef or chicken, served commonly in a creamy, dairy-based sauce, and either over rice or pasta.  Somehow the recipe has been embraced by Iran, England, Japan, China, Sweden, Portugal, and a few others, though of course it's different in each country.

Though the dish in America typically calls for sour cream, it turns out that the Russians use their own, more epic soured cream called smetana, which is apparently richer and won't curdle, which can't be said for my light sour cream.  But alas, I was not able to find this in the grocery store, nor did I actually look for it.  The flavor and mouthfeel came out just fine, in my ignorant taste buds' opinion.

If you look up the original recipe I stole (which you shouldn't, it's more boring), it doesn't call for actually lighting the onions on fire.  But my version ended up receiving much fanfare, and produced amazing smells from sauteed onions that I had to resist eating right out of the pan.  So if you are bold, I recommend a bit of flambe when you make this.

Nothing says cooking like the imminent threat of destroying your home.

Beef Stroganov
mostly liberated from Tyler Florence, with adjustments
  • 5 tablespoons olive oil
  • 4 (5 to 6-ounce) London broil, cut into 2-inch cubes
  • 1 1/2 cups finely chopped onion
  • Salt and freshly ground black pepper
  • 3 sprigs thyme
  • 3 tbsp cognac or brandy
  • 1 cup dry red wine
  • 1 1/2 cups beef broth
  • 3 tablespoons unsalted butter
  • 3 cloves garlic, chopped
  • 1/2 pound fresh shiitakes, stems discarded and caps thinly sliced (about 2 cups)
  • 1/2 pound white mushrooms, trimmed and thinly sliced (about 2 cups)
  • ¼ cup sour cream, plus more for garnish
  • 1 tablespoon Dijon mustard
  • 2 tablespoons chopped fresh parsley leaves, plus more for garnish
  • 1 package egg noodles

Pat the beef dry and season it with salt and pepper.  Heat 3 tablespoons oil in a large heavy bottomed skillet over high heat.  Fry the meat in batches so that it is browned on all sides, placing on a plate if using a regular pot, or transferring to the pressure cooker if you are using it.  Lower the heat to medium and, if not using a pressure cooker, return all the meat to the pot.  Add the onions and cook until they are soft, about 5 minutes.

We've been through the discussion about not crowding the pan before, but again, this is all you want in there at at one time, to encourage browning rather than 'steaming' your meat.  This cut was labeled "London Broil", which in fact is not a cut but a style, and which was in fact a very lean cut of top round requiring extended braising to coax out any tenderness and impart the flavors we wanted.

Look - nicely browned due to the Maillard reaction, good flavor bits on that meat, and not totally cooked through until you put it in the pressure cooker.  Without this step, the meat will taste much more bland.

Now carefully, pour in the cognac and flame until alcohol cooks off.  You may consider turning off the stovetop before you do this, at the risk of screwing up and losing your arm hair, although if you are a woman maybe this isn't such a bad thing (though you didn't hear it from me).  You can either tilt the pan to expose the vapors to the stovetop flame, or better yet, use a long fireplace starter to ignite remotely.  Cook, shaking if you wish, until the flames die out.  If the flames reach your ceiling, please contact the distributor of your alcohol for a full refund on the price of your home.  A good safety guideline is to have a tight-fitting lid for the pan at the ready, to smother the fire if it gets out of control.

Adding the brandy, seconds before the action shot above.  Disregard my complete unpreparedness - no lid, no fire extinguisher, just a spectator with a camera and a beer in his other hand.  I think I hear the Allstate guy.

Once the onions are properly flamed, add the beef stock and red wine, or transfer to the pressure cooker and add everything to that.  Cook, partially covered, over a very low flame for 1.5 - 2 hours, or in a pressure cooker for 45 minutes.  Towards the end, start boiling a large pot of water for the noodles.

Fully browned meat, hanging out in a trench of red wine before its timely demise in the grip of my pressure cooker


In a large skillet over medium heat, melt 3 tablespoons butter in the remaining 2 tablespoons olive oil.  Add the mushrooms, garlic, and remaining 3 thyme sprigs and cook until the mushrooms are browned and cooked through.  Remove from heat and set aside.

For a bit of variety and some more interesting flavor, don't skip on the shiitake mushrooms.

As you cook these, they will soak up the fat in the pan and then eventually let it go if you cook them long enough.  Keep stirring over medium-high heat, and they will eventually brown and become delicious.  They shouldn't 'squeak' when you're done.


Boil egg noodles according to package directions.  Drain and have ready to plate.

When the meat is done, remove it from the heat and fold in the mushrooms, sour cream, mustard, and parsley.  Taste and adjust the seasoning with salt and pepper.  Serve stroganov with buttered noodles and a green vegetable of your choice.

The final setup

Add the mushrooms, sour cream, parsley, and mustard off the heat

The finished dish, served with asparagus over egg noodles.  High marks from all.

Sunday, February 19, 2012

Shepherd's Pie

If the British are known for one thing in their cooking, it's for being about as exciting as a toothache.  But if you like meat and potatoes, forget about going anywhere else, because these folks have this market cornered.  Bangers and mash, kippers and neeps (technically a turnip, but same deal), shepherd's pie, meat pasties - you name it, and folks from the mother land have taken a stab at it.  And by and large, they screwed it up.

That's right, I said it.  I entertain your rebuttal in the comments.  Despite this, I still like British food, because sometimes a man needs to just eat a bunch of meat, served in stew form, with naught but the most basic of flavors.  But in searching for a good Shepherd's Pie recipe, I came across some that I might feed to a dog, but none that I would feed to a diner who wants more than just 'people food'.  So I had to borrow from the French and add some flavor to the recipes, as well as adjust the preparation method to get the most out of the different ingredients.  I even tried to get fancy and pipe my potatoes on the top of the stew, but that didn't quite work out, as we shall see.

Shepherd's Pie is a simple recipe, consisting of a meat stew with a mashed potato crust.  To be proper, I actually made a "Cottage Pie", since shepherd's don't really raise beef but mutton or lamb, but nobody calls it that so I'll stick to my guns on this one.  The dish came about as a way to spread the usage of the potato as an edible staple for the poor in England - kind of like the American history of corn syrup (or, if you go back far enough, whiskey), but a little bit more wholesome.

The finished Shepherd's Pie, with one serving briefly removed and replaced before I remembered to take a picture

Shepherd's (actually, Cottage) Pie
from nowhere in particular, designed by me for a change

  • 1 tablespoon vegetable oil
  • 1 large onion, peeled and chopped
  •  2 medium carrots, peeled and chopped
  • 2 cloves garlic, chopped
  • 1.5 pound ground lamb or beef
  • 1 cup beef or chicken broth (use good stuff if you can - I used homemade stock)
  • 1 tablespoon tomato paste
  • 1 teaspoon chopped fresh or dry rosemary (fresh is greatly preferred)
  • 1 cup dry red wine
  • 1 cup frozen peas
  • salt and pepper, to taste
For the potatoes:
  • 2 pounds russet potatoes, peeled and cut into chunks
  • 6 tablespoons unsalted butter
  • 1/2 cup milk (any fat content)
  • Kosher salt to taste
 
Get your ingredients ready.  The list is fairly short.  If you have mashed potatoes left over from something else, the list becomes even shorter.

Grind your meat with a coarse blade.  You don't have a meat grinder?  Maybe your butcher will do it for you, if you flash a little skin.
These three ingredients represent the shortcomings of English food - aromatics, and complex flavors.  Garlic, rosemary, and red wine turn this from mess hall chow to something you could serve to a weary chef.  Or shepherd, I suppose.


Preheat oven to 375°F.

In a large sauté pan over high heat, heat the oil and brown the meat in 1-2 batches.  Season with salt and pepper during browning, and be sure to keep the heat high and not just boil the meat.  You want to see some brown bits, even if it means things sticking to the pan for a while.  Meanwhile, bring the potatoes to a boil in salted water. Cook until tender, about 20 minutes; drain.

To the pan with meat, add the onion and carrot, and cook until softened, 3-4 minutes.  Add garlic, and cook until moisture has been released from onions and carrots are beginning to soften, another 4 minutes.  Add the red wine and boil until liquid is mostly evaporated, 4-5 minutes.  Add the broth, tomato paste, and rosemary, and reduce the heat.  Simmer until the juices thicken, about 10 minutes, then add the peas.

Here's the mix, after reducing out the wine, browning the meat, and adding all of the vegetables and aromatics.

Mash the potatoes with the butter, milk, and salt, and set aside.  If you want to pipe them, prepare a piping bag after letting the potatoes cool slightly, and get a tip that will let you dispense a good bit of potato at once.  Or, use my cheap method:

Don't have a piping bag?  Use a zip-top.  Just put the potato in...

...twist the bag to squeeze the potato down to the corner, and then cut off the corner and pipe.  Focus on putting pressure on the bag from the top, with the part of your hand between your thumb and index finger.  Keep twisting the bag to keep air out of the piping section.

So close!  But I ran out at the end, and had to spread the potato on after all of the effort.  Next time I might put a real tip on the bag to get something that doesn't look like a bunch of uncooked breadsticks, or something worse.

Spread or pipe the potatoes over the meat mixture, then crosshatch the top with a fork.  Bake until golden, 30 to 35 minutes.

The 'pie', after dragging a fork to create a nice browning surface

The finished pie, not quite as browned as I would like, but every bit as delicious as a hearty French stew

LinkWithin

Related Posts Plugin for WordPress, Blogger...