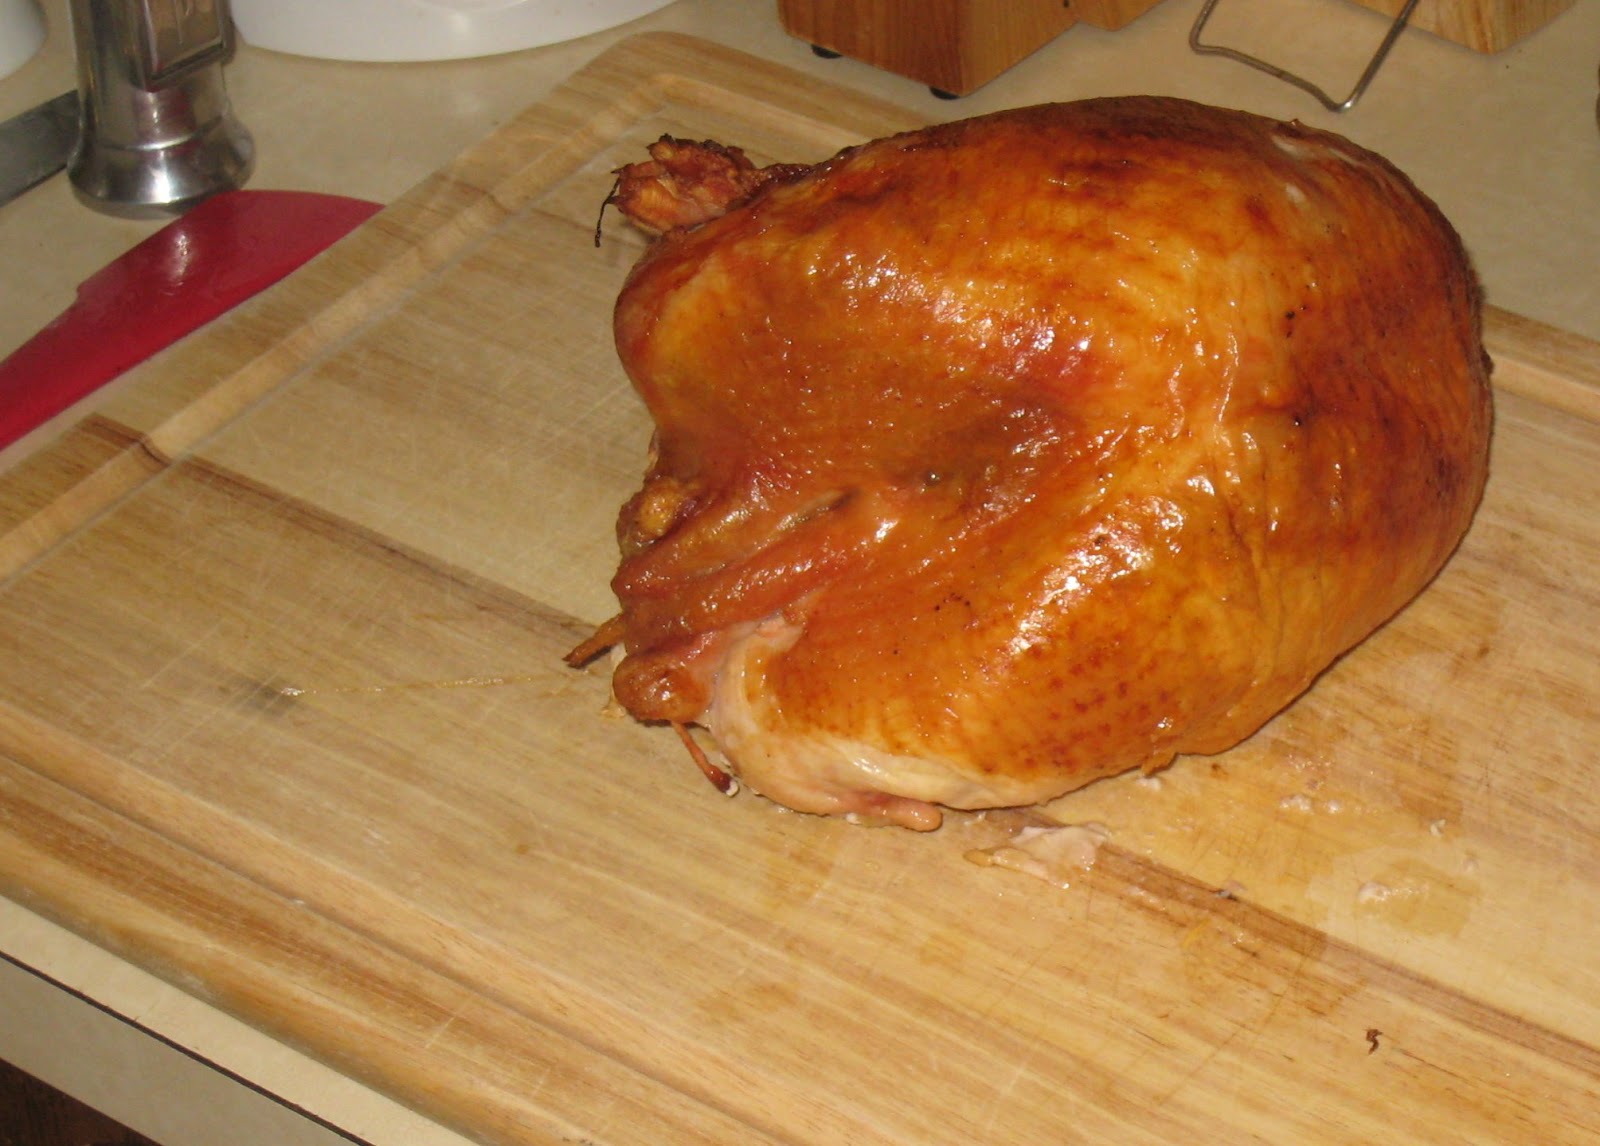
In an attempt to squeeze more value out of my meat slicer, I've been on the lookout for turkey breasts to roast. I finally picked up a few on sale, and got a chance to cook one following my standard method. Roasting just the breast is much more foolproof than a whole turkey, because you don't have to worry about the breast drying out before everything else is cooked through. All you have to worry about is a single temperature - 160 degrees F.
Yes folks, heed my words - 160 degrees F! Not 170, not 150, and certainly not 180... unless you're just as happy chewing on the sole of your shoe as you would be eating a delicious, moist slice of white meat. Keep in mind that the temperature of any large solid object (turkeys, bricks, laundry) will increase at its center at least slightly once pulled from the oven, and you will be perfectly safe pulling a turkey breast out at 160, resulting in a final temperature of about 165. Even the USDA says you can get away with
165 degrees, so why bother overcooking just because you refuse to live life on the edge?
I will add this - a digital probe thermometer is an absolute necessity for any kind of roast beast. Dial thermometers are slow, inaccurate, and impractical unless you leave them in the bird constantly. What's more, I am a hardliner about how I measure my temperature, which I accomplish using TWO probe thermometers; first, a corded digital oven thermometer such as
this one, and second, a handheld thermometer, specifically
this one. We have the technology - let science work for you. The oven thermometer stays in the bird and has a base unit that sits on the counter, beeps to let you know when your roast reaches your desired temperature, and allows you to keep the oven closed. Consider this - Shirley Corriher says in her book
Bakewise that opening the oven door for just 30 seconds will cause the oven temperature to drop by 150° or more, requiring several minutes to come back up to temperature. So a leave-in thermometer will let you cook your bird faster and more uniformly, without heating up the house. By the way, my second thermometer just confirms that my first thermometer is working right. But a third thermometer, now that's just right out.
In addition to my roasted turkey breast, I served a few of my favorite (and arguably required) sides - steamed asparagus, roasted root vegetables, cranberry sauce, and a quick pan gravy. I'll give recipes for these shortly, but first, a few words on root vegetables: eat them! They are delicious, and I feel like they are a forgotten staple in the American pantry. There are so many different root vegetables out there to add body and subtle flavors to otherwise bland foods, like adding parsnips to your mashed potatoes or a side of fried yucca with your burgers.
If you are the first person to post a comment back on this site with the correct identification of all the vegetables in the photo, I will let you choose which dish I will cook next. You present me with
three [reasonable] options, and I will pick one of them and make it to the best of my ability. I will note that, as of 11/21/2012, this riddle has been solved.

|
| Correctly comment with the names of all the vegetables and you select what I make next! |
Anyway, I found a recipe online for a rosemary-roasted root vegetable dish, so I decided to abandon the exact ingredients and substitute what I could find. As long as there's some balance in color and flavor, most root veggies can substitute for each other in this dish.
I will only quickly touch on the gravy process, which did not have many stellar pictures. The cranberry sauce is an old family favorite though, so I will include that one.
Roasted Turkey Breast with Rosemary Roasted Root Vegetables and Homemade Cranberry Sauce
- One (6-8 pound) turkey breast, thawed
- 2 tbsp butter
- 1 tsp salt
- 1/2 tsp freshly ground black pepper
- 2 cups chicken or turkey broth / stock, preferably homemade
- 2 tbsp rosemary, thyme, or sage, depending on your tastes. I recommend sage here.
- 3 pounds assorted root vegetables (turnip, rutabaga, garlic, shallots, sweet potato, red potato)
- 2 tbsp olive oil
- 1.5 tsp salt
- 1/2 tsp freshly ground black pepper
- 1 quart cranberries (or more realistically, 1 bag)
- 1 cup sugar
- 1 cup water
- 1/4 tsp cloves
- 1/2 tsp cinnamon
- 1/8 tsp nutmeg
- 1 tbsp lemon juice
Let's start with the cranberry sauce, since it's so easy. In a 2-3 quart pot, bring all ingredients to a simmer until berries pop. Remove the berries with a slotted spoon, and continue boiling the remaining syrup until it is reduced by 1/3 to 1/2. Transfer everything to a bowl, and refrigerate until set. That's it!
Now, onto the turkey. Preheat oven to 350 degrees F. In a small bowl, melt butter. Rinse turkey and place on a rack over a roasting pan. Why use a rack? Because otherwise it will stick to the pan and not cook evenly, and the bottom will come out gross. If you have time to leave the bird out at room temperature for 30-60 minutes, do so. This will make for more even cooking, and make sure the bird is dry before going into the oven, ensuring a good crisp skin. RIGHT before you put it in the oven, season with salt and pepper, both inside and out. Then pour the melted butter on the turkey, rubbing it onto the skin on all sides. This makes for a deliciously browned, crispy skin texture that's, well, it's just great. Finally, pour the broth around the bird in the roasting pan. You can use this to baste the bird if you like, or it will just hang out and infuse more flavor into the bird, keeping it moist.
 |
| Preparing the turkey breast for roasting. Butter has already been rubbed into the skin. |
Insert a probe thermometer into the thickest part of the breast, away from the bone. Set the temperature alert to go off at 160 F, as mentioned above, and pop your roasting pan in the oven. You'll notice the temperature shoot up a lot at first, and you may think this rate will continue throughout the cooking. Well unfortunately, the laws of thermodynamics are a harsh mistress, and you should see the temperature increase slow down as the bird approaches doneness. I've had it look like we'd eat in 10 minutes, but it took 30 to finish! Expect it to take about 1.5 - 2 hours total to roast a 6-8 pound bird.
Meanwhile, contemplate your roasted root vegetables. I have a different recipe where you put them in the pan with the turkey, but this time I'm going for plain turkey that goes on sandwiches afterwards, with no notes of anything vegetative in the turkey. So peel and chop your veggies into evenly sized bites, roughly 1" cubes or slices if you prefer. I went for a mix. Place these on a baking sheet lined with aluminum foil, or better yet, parchment paper, and toss the vegetables with olive oil, salt, and pepper. Don't add the herbs (sage or whatever) just yet - wait 30 minutes before adding them, or they will burn and become bitter. The olive oil is essential for conducting heat into the vegetables, which would otherwise just burn on the edges and bottoms, and get dry and weird everywhere else.
Put them in the oven when you think there will be roughly 1 hour left of turkey cooking time (30-45 minutes after you start the bird), and stir them every 20-30 minutes. After 30 minutes, go ahead and add the chopped herbs. Sage pairs well with turkey; rosemary and garlic not so much.
 |
| Prepped root vegetables, awaiting my further pleasure. |
Once your bird is at 160 degrees, remove it from the oven. I'll bet you think you're done, right? Wrong. You have to let the bird sit, to contemplate its existence for a while. The bird is, understandably, pretty ticked off right now, and is ready to just blow up at you for throwing it into a hot oven after a stay in a perfectly good refrigerator. If you plan to tent it with tinfoil, do so loosely, or else the steam will make the crispy excellent skin into something more like rubbery onion peels. During this poultry meditation ritual, the bird will relax, and, being less uptight, will let its juices distribute evenly throughout. Cut the bird too soon, and juices will run all over your cutting board and onto the floor, and the bird will be dry. But if you wait 15 minutes, you will get a moist, succulent bird, still very warm, which has retained its beautifully crisped skin.
 |
| A roasted turkey breast in somber meditation before carving |
As the bird is resting, finish roasting the root vegetables. If they're not yet browned, give them another stir, crank the oven to 400 F, and keep going. You want them to be slightly browned, not burned, and not just cooked through. The browning is what brings out the caramelized sugars, which is really what you want in terms of flavor development. It also gives the vegetables a pleasant crunchy texture, as opposed to one of baby food.
 |
| The finished roasted vegetables |
If you want to make a gravy, you have three options:
- Use the weird bag of gravy that came stuffed into your turkey from the store (not advised)
- Stir up the pan drippings with white wine or cold broth and make a pan sauce (use when you have only a little liquid in the pan)
- Collect all the drippings, separate the fat, and make a traditional gravy (use when you have more than 1 cup of liquid in the pan)
I tried for option 3, but it didn't work out as I had hoped. So I will table the gravy discussion until another article, most likely some time around November.
The end result, however, came out to be a festive pre-Thanksgiving feast. The turkey was moist, the vegetables crispy and full of flavor, and the cranberry sauce refreshing. All in all, this wasn't a very exhaustive meal to make until I made the gravy, which I find to always be the extra cooking step that turns a fun evening into an aggravating one. So if you can live without gravy, this whole process should take less than 15 minutes of prep time and only minor monitoring throughout, with the end result being pretty spectacular.
 |
| The finished meal, seconds before I finished it. |