
The first time I made this I had no idea what to expect, so I brought it in without tasting, set it down at my department event, and walked away for about two minutes. When I came back, this gigantic cake was completely gone. So this time I tried a piece before serving, and now I see what the excitement was about. Not too sweet, incredibly moist, fantastic flavors and very colorful. Everyone had great things to say.
I'm going to teach you how to make your very own, which I don't recommend for just a small family gathering. Only make this if you have a lot of people coming over - preferably ones you want to impress. You're going to make your own whipped cream, and you may even bake a cake. But the real fun of this one is the assembly, which is unlike anything I've ever seen before.

Zuccotto
- 1 16 ounce pound cake (home made or store bought)
- 1 devils food cake mix (or store bought chocolate pound cake)
- ½ cup strawberry jam
- ¼ cup Amaretto, or Luxardo Maraschino (preferred)
- 1 6-ounce bag miniature semisweet chocolate chips
- 2 cups heavy whipping cream
- ½ cup confectioners sugar
- 1 teaspoon almond extract
- 1 cup slivered almonds, slightly toasted
Equipment needed:
- Bowl that is 9 inches across and 4-6 inches deep.
- Good serrated knife, or an electric knife (recommended)
- Handheld electric mixer, or a stand mixer
If making cakes yourself, prepare per recipe instructions on box. I recommend you buy the pound cake, and make the devil's food cake. For devil's food cake mix, pour half of mix into a greased and floured ovenproof 6 inch diameter bowl - I used a Pyrex mixing bowl, and filled about halfway full to allow for rising. Bake the remainder in muffin cups - note that these will cook MUCH faster than the large bowl version. If you don’t have an ovenproof bowl, get one. Because of size differences you need to approximate the times listed on box for the bowl-shaped variant, but use a toothpick for testing and you'll be fine. A toothpick inserted should pull out clean, so check regularly to avoid overbaking and drying it out. For the record, the small bowl cake took about 10-15 minutes longer than the package directions said for the most stout of cake shapes it described. Unfortunately, it seems the Duncan Hines folks didn't expect people to be baking their products into bizarre geometries, so I had to sort this out on my own.
Cool the cake(s) for 20 minutes, then turn out on baking racks to continue cooling. Slice the pound cake into ¼ inch thick pieces, trying to be as consistent as possible. Now line a 3 quart mixing bowl with plastic wrap. Layer the lined bowl with slices of pound cake, overlapping slightly to create a pound cake bowl inside the mixing bowl.
 |
| Only an electric knife would let you get this many evenly sliced pieces. I love mine. |

Mix strawberry jam and almond or cherry liqueur (not the extract). A note - I used Luxardo, an excellent liqueur used to make the real Maraschino cherries (recipe to follow soon). This has a very sweet taste with notes of both almonds and cherries, and I thought it was an excellent substitution for Amaretto. Whatever you use, mix in a 1:2 ratio with your jam of choice, and brush over inside of pound cake bowl.
 |
| Brush the jam and liqueur in the layered pound cake. Careful not to get the jam on the outside of the cake, or it will ruin the exterior appearance |
In another mixing bowl beat whipping cream, sugar and almond extract until stiff peaks form. Fold in chocolate chips and almonds. Spread evenly over bottom and sides of pound cake bowl, using a spatula or back of large spoon to smooth.
 |
| Fold the mini chocolate chips and almond slices into the whipped cream, gently |
 |
| Spread a good layer of the almond infused whipped cream inside of the lacquered pound cake |
Place bowl baked chocolate cake gently in the center of whipped cream lined bowl. If using store bought chocolate pound cake just cut to fit center. Fill in gaps by cutting scraps from remaining cake. Be gentle when adding the cake so as not to redistribute the whipped cream layer.
 |
| The devil's food bowl cake, before I inverted, trimmed the bottom, and nestled into the whipped cream. |
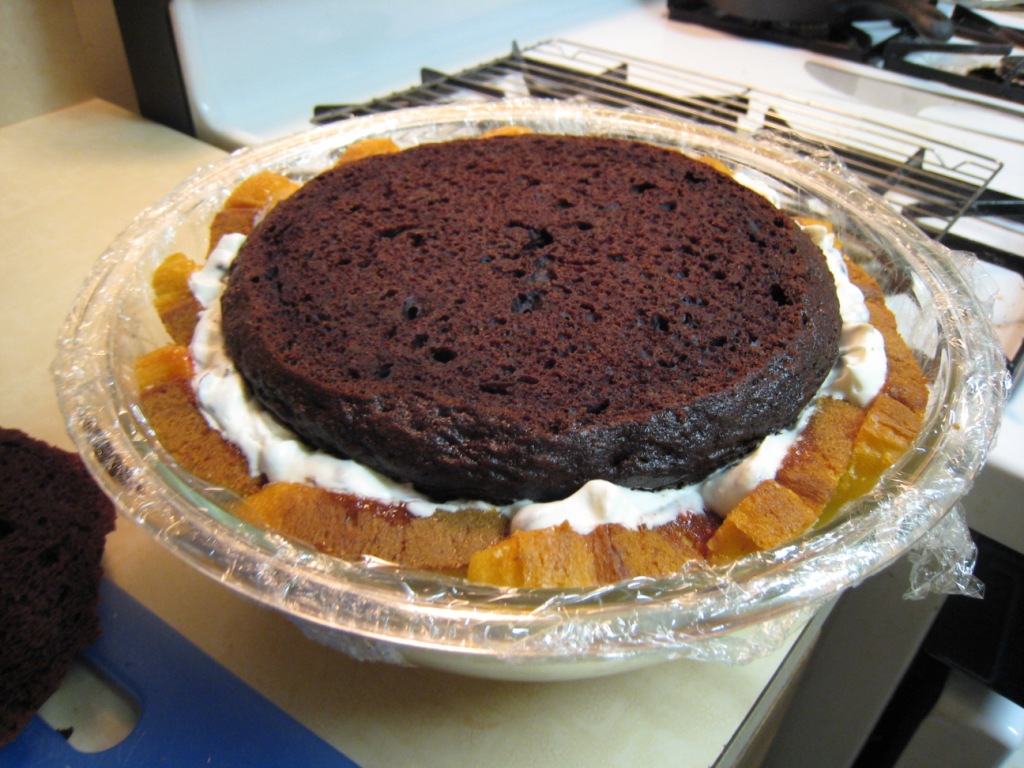 |
| Like a glove! |
Cover with plastic wrap and refrigerate cake overnight. Put some pressure on with the tension of the plastic wrap, to help apply a downward force that will compress the cake and press the pound cake out to the shape of the bowl.
To serve, place serving plate on top of bowl. Turn bowl over and remove plastic wrap. Garnish by placing strawberries around cake and place one on top, cut in a fan shape. To make fan shape strawberry, just make 4-5 slices ¾ of the way through from top to base. With both hands holding strawberry gently spread so it creates a fan shape.
 |
| The final cake, turned out of the bowl. |
 |
| Here's what you have waiting for you - two cakes in one, with a few delicious extra layers of fruity, nutty awesomeness in between |
You may have noticed a gargantuan quantity of pound cake at the beginning of this recipe. If you find yourself with too much cake, hopefully you have made the extra cupcake-sized devil's food cakes, and have some leftover whipped cream. I was able to make a medium-sized and small-sized zuccotto to send off with friends in addition to this huge version, which was a great way to use up everything I made.


